How to Build a Live Edge Wood Table
Where do I buy live edge wood slabs?
I am very lucky to live 20 minutes from the worlds largest supplier of walnut slabs. So I just drive over to Goby Walnut. If you don’t live 20 minutes from Goby, you are still ok. They have an awesome online store and ship worldwide. They even say that about 60% of their business is out of state. If you don’t want to have something shipped in, that is totally understandable. Check out my blog on buying live edge wood for more ideas on where to find good slab wood from places like Craigslist and Facebook marketplace.
How do I Get the Live Edge slab flat?
You will definitely need your slab to be flat before you get too far into the process. Goby generally just flattens one side and kinda skims the other side. For a small fee, usually around $60, they can flatten both sides for you. As long as the slab isn’t too warped or twisted anyway. If it is, you might want to consider a new slab. Or risk fighting a twisted table for the next ten years. Alternatives to Goby-flattened would be a DIY router sled, CNC, or renting time out from a local shop who has a big planer or wide belt sander. Check out this blog for a little more info on the flattening process.
Cleaning up the wood cracks and live edges
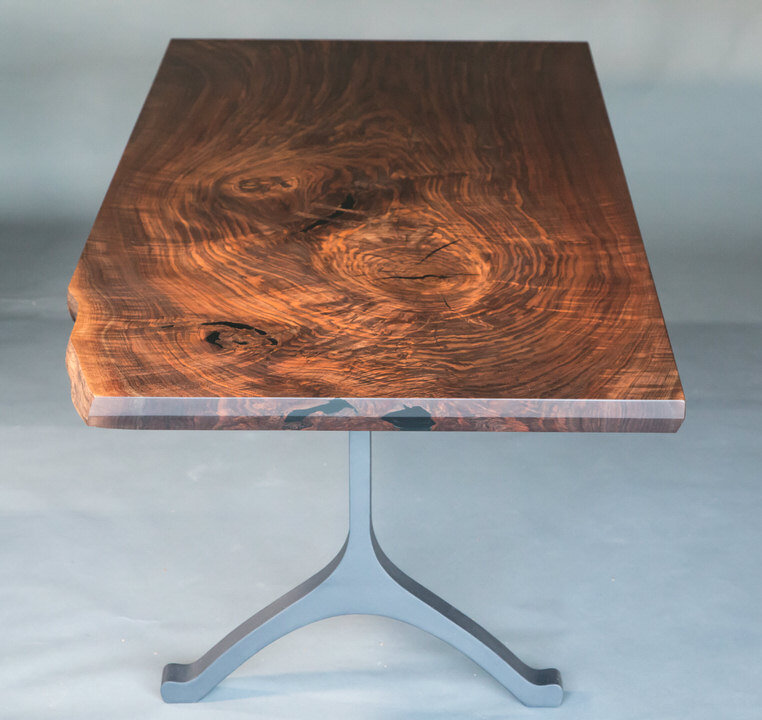
My most recent table was originally going to be a square edge table. After looking at it long enough I decided to leave one corner with the live edge. It was just a design aspect that seemed pretty unique and kinda cool. So don’t be afraid to step outside of the box. You aren’t necessarily limited to just live or straight edges. Make what you want! Or at least what your wife wants.
One thing I don’t recommend is leaving the bark on. First off, its pretty abrasive and would snag your aunts sweater next thanksgiving. Second, it might crack and fall off on its own a year or so later. So get that bark off any way you can. I like a wood mallet and a dull chisel. Just try not to dig into the actual slab with your chisel. Once you get the bulk of the bark removed you will need to get rid of the little strands and fibers that remain. I really like using my Porter Cable Restorer and a nylon wheel for this. The nylon wont scratch the wood, but will remove all the remaining strands of bark.
Most any decent sized slab will have some cracks and/or gaps that will need addressed. First they will need to get cleaned out though. I use few different chisels, a mallet, a wire wheel on my drill, dental tools, a screwdriver, basically whatever it takes to get down into the crack and break out any loose wood, bark, soil, rocks, or other debris that was trapped in there. In the end you want just a solid wood slab.
Filling the cracks (or not filling the cracks)-How to fill wood cracks
I’ve seen some extremely high end tables with big open cracks. It is not uncommon for some designers to leave the gaps open as kind of an artistic choice. I actually like the look too, and will probably do that on the right table eventually. For now I prefer to have a nice smooth top though. It looks a little cleaner and I don’t have to worry about someone spilling a glass of water down a crack that could compromise my table. So I fill all my cracks with epoxy. You can tint your epoxy any imaginable color if you want. Although, I almost always fill my cracks with black tinted epoxy.
Black epoxy in the cracks that have been sealed with clear epoxy
If you are going to tint your resin black (or any other color) I highly recommend sealing the crack with a clear resin first. The tinted resin will actually act as a stain and seep into your wood. Which can leave an ugly black stain all around your crack. If you seal it first with clear resin it will prevent 100% of the color bleed.
I recommend using a fast curing epoxy for both sealing and filling the cracks. I keep a tub of West System epoxy handy for these projects. The pump system makes measuring dummy-proof and super fast. The epoxy also cures very hard and is just a great quality epoxy.
To fill your cracks, first seal the underside of the crack with Tyvek tape, not painters tape. Painters tape will leak about 50% of the time. So that doesn’t mean you can’t use it if its all you have. Just be warned. Mix up a pump or two from each container of epoxy, add just a drop or two of black dye. Mix very well. If you crack is large, limit your epoxy pours to about an 1/8th of an inch. This epoxy cures fast and will overheat if you pour more than that. If your crack isn’t more than 1/8” wide, but 2” deep, you should be fine to fill the crack in one shot. If you do accidentally pour too much epoxy and it overheats, it really isn’t the end of the world. Just pour another layer on top of that epoxy and don’t tell anyone. The strength of the epoxy will be compromised, but we are just filling these cracks for looks. Not necessarily to strengthen them. Although the epoxy will assist in preventing the crack from separating further (not guarantee it though).
do I need to use Bow ties?
Some people love the look of a bow tie joint. Also referred to as a Dutchman joint. I personally love them. Perhaps to a fault. If left unchecked I can put too many in and not realize it till after its done. The good thing is my wife only cares for them very sparingly. So I let her look over my shoulder when I am choosing my layout.
Every gap doesn’t need a bow tie just because it is cracked. Some areas are a higher risk to continue splitting. Unfortunately, I don’t have a comprehensive guide to what crack needs a bow tie and what crack doesn’t. It is varies largely from slab to slab. I would say that any cracks originating from the end of the slab need to be addressed though. If you aren’t sure about a certain spot, don’t be afraid to play it safe and add a bow tie or spline from the underside. I often add a number of straight splines to suspicious cracks on the bottom. That way I have piece of mind, and I don’t risk making my table look like Frankenstein.
If you’d like a full tutorial on how to inlay a bow tie joint (or anything else), check out this blog post. Or if you’d like to know how to cut a perfect bow tie, check out this blog.
The most important thing about any inlay is having some really sharp chisels and a good a marking knife. I recommend Narex chisels for an affordable option and a Japanese marking knife. Xacto knives work well for about 10 seconds. Then become too dull to do much.
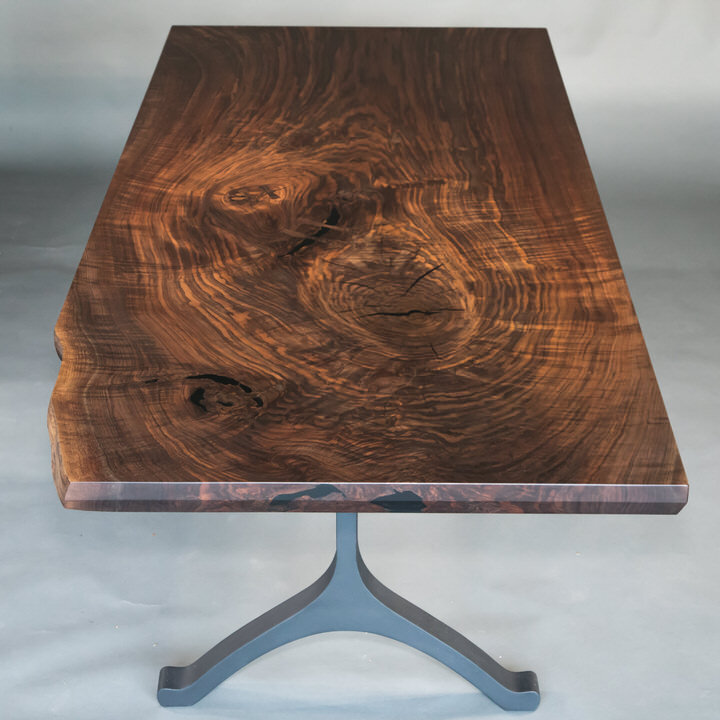
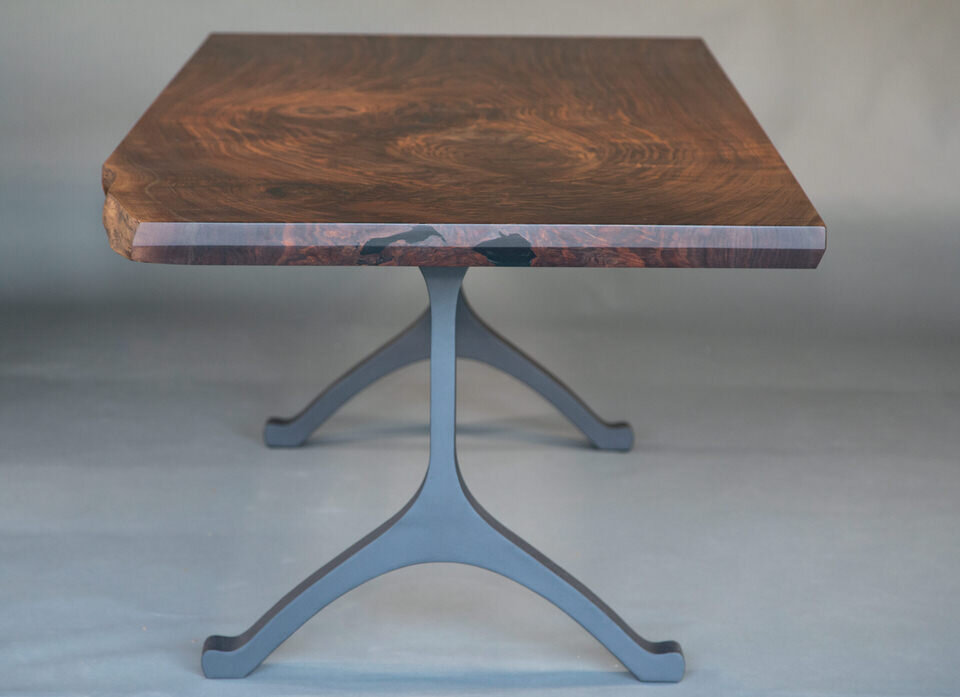
Steel C-channels to keep your table flat
Ever wonder why we didn’t see a lot of tables made from a single slab until fairly recently? It is because a single slab of wood is about the least stable piece you could make a table from. A slab often wants to cup, bow, twist, and crack. Traditional tables are generally made from a number of narrow pieces glued together. They even alter the grain orientation of these pieces to counteract any tendencies to cup or bow. This of course isn’t possible with a single piece of wood. The geniuses over at Canadian Woodworks came up with a rather clever solution to this problem though. They recess lengths of 1/4” steel C-channel into the underside of their slabs. Before you get too excited about fixing that twisted slab your grandfather has behind his barn. They aren’t a fix-all. Paul from CWW says the C-channels “negotiate with the slab to keep it flat.” Which I rather liked. Basically, it will stop minor flexing, but is no substitute for a completely and properly dried slab.
People often ask how big of a slab needs a C-channel. There is no rule book on this just yet. But I would say over 30” and you will want some support either from a nice flat table base, apron, or C-channels. Click here to shop these channels.
Inlaying them can seem a little daunting. But I made a video on how to do it pretty easily. Check it out here.
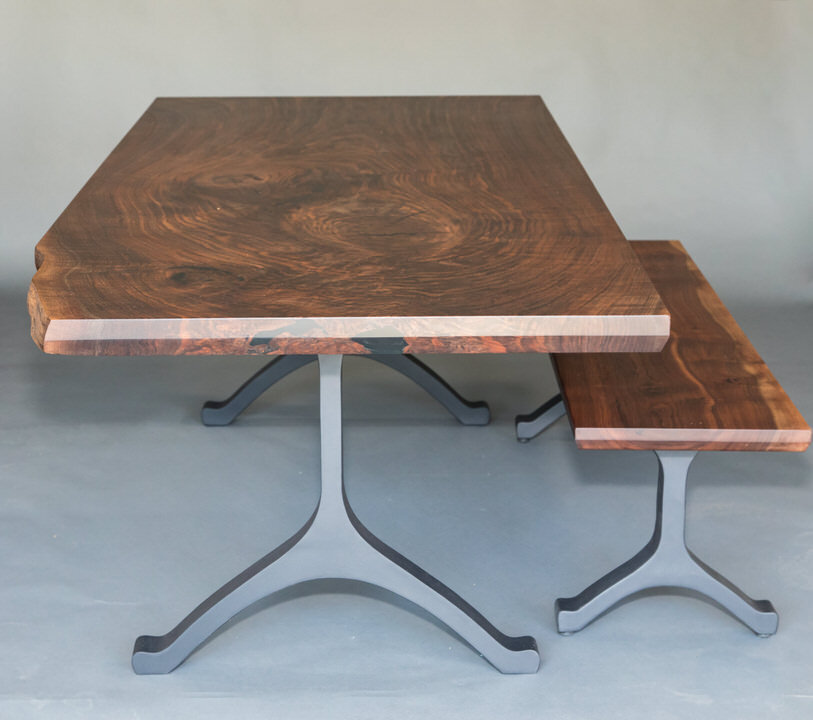
how tall should my table be, and where do I mount the legs?
The top of your dining table should be 30” from the ground. So make sure you know how thick your top is before you order your legs. There is a big difference in a 1.5” top and 3” top attached to the same legs. Most good steel legs can come with threaded leg levelers. Which gives you about a 1/2” of room for adjustment.
Most people want the option to seat someone at the end of the table too. So I recommend at least 16” from the end of the table to the front of the leg to comfortably pull a chair up. If your table is over eight feet, you can push that to 18-20”.
how do i attach legs to a table?
This of course varies depending on the style of legs you choose. I went with a modern wishbone design by Flowyline Designs. Legs by Flowyline are great because they have a 1/4” steel mounting plate with slotted mounting holes to allow for wood expansion and contraction seasonally.
Flush mounted legs and C channel make for a clean look.
I always use threaded inserts to attach my legs and bases now. You don’t have to use old construction lag bolts anymore. In fact, don’t use those. Drop a couple extra bucks and add in some good steel threaded inserts. These will allow your table to come apart from the legs/base an infinite number of times without ever stripping out your mounting holes.
You can’t (shouldn’t) just bolt your base down tight to the wood. You need to allow room for the wood to expand and contract seasonally. Especially on large slab tables. This is why shops like Flowyline are nice enough to add the slotted holes to their mounting plates. When you attach your base, just get the bolt snug, not tight. I get it all the way tight, then back in off 1/3 turn. That way your base will stay snug, but the wood can still move around the bolts. You can even add a little paste wax to your bolt to keep it sliding with the table, not the base.
sanding. And sanding. then some sanding - How to sand your solid wood table
If you love sanding, you aren’t doing it right - Me, 2020
Sanding is pretty universally the least liked aspect of woodworking. Its messy, its hazardous to our health, its tedious, it is difficult to get right, and worst of all, it is absolutely necessary. Luckily technology has come a long ways to help with this most beloved woodworking pastime. Dust extractors and orbital sanders are a luxury the previous generations could only dream of. If you are serious about woodwork, get yourself a HEPA extractor like this one from Festool and their brushless orbital. It is a significant investment. But your lungs, wrists, and tables will thank you.
I made a dedicated step by step blog on how to properly sand wood. Including what grits I use and what sandpaper I prefer. Check it out here.
Whats the best way to finish a table?
I’m not sure if everyone actually loves finishing, or if they are just relieved to be done sanding. Either way, finishing is generally the exact opposite of sanding. In a few seconds to a few minutes (depending on your finish) you get to see all your hard work come to life. Over the last few years I have become a big fan of Hardwax finishes. They provide great protection while being able to be applied in any environment. Even a dusty shop like mine. Where traditional finishes like varnish and lacquer essentially require a dedicated spray booth. Even then there is a good chance of a hair or dust nib settling on your fresh coat of finish before it cures. Hardwax finishes provide protection by bonding with the wood, then having the excess oil removed.
My latest project I finished with Rubio monocoat. Initially I used a similar finish that ended up drying out in a few weeks. I have been loving the Rubio finish lately. Incredible look, feel, and protection. Without any of the downsides found in that other finish I used that dried out. I am still learning about Rubio, but once I become an expert on it, look for a blog and/or video. If you want to check out a previous blog using Osmo (not the finish I had a problem with) check out this blog I did on getting a perfect finish in a dusty shop.
enjoy your hard work!
These tables are meant to be used! Don’t be afraid to have the family over for the holidays and make the most of your new table.