
Everyone is Wrong About Refinishing Wood Floors
BONUS… and how not to make your house smell like a meth lab
Basically, everyone—at least in the United States—seems to be refinishing their wood floors incorrectly. If you don’t know, the standard practice for years has been to slather the floors with a thick layer of plastic. The problem with this approach is that the plastic traps every possible speck of dust and hair during application. On top of that, it makes your house smell like a meth lab for a week—not great.
The process I’m going to show you has been used in Europe for decades, so this isn’t something I just invented.
The floors I’m going to be refinishing are the hardwoods in my personal home. These are Brazilian cherry floors, which are an excellent flooring material—but they are absolutely beat to hell.

As you can see, they previously had one of those old clear-coat finishes on them. I’m not going to lie—this isn’t an easy process, and there were a few hiccups along the way. But as you continue reading, you’ll soon understand why it’ll pay off.

As a woodworker, I have some pretty nice tools. This is a Rotex sander, which, if you don’t know, is basically a cross between an angle grinder and an orbital sander, and because this isn’t a tool I had to rent—it’s something I already own—the only cost involved was the price of sandpaper, which is pretty affordable.
However, I knew the edges would be a little trickier, but I figured: how bad could they be? I tried another smaller Rotex sander with a triangle attachment, which seemed like it might be perfect for the job. The problem, though, is that the triangle attachment doesn’t have the same gear-driven Rotex action—it basically just vibrates in place. Unfortunately, this didn’t work at all.


I soon realized I needed another plan... I think it took well over an hour just to complete a single stair.
What didn’t take long, however, was for me to realize that I needed to hire an actual flooring company to help with this, because clearly, I’m not the right person for the sanding job.
And just to be clear, this is a project about how to refinish floors, not necessarily how to sand them. Or at least, it is now.
Sanding floors is one of those jobs that most of us can do; it’s just a question of whether or not we want to spend the time doing it. In the end, I decided I’d be better off letting the pros handle it—which I gladly did.
The finish I’m going to be applying is something I’ve used for years on my woodworking projects, so I feel really comfortable with it in that capacity. However, applying it to a floor is an entirely different process.
To make sure I didn’t mess this up, I reached out to a colleague of mine who has essentially taught me everything I know about LED-cured hard wax oils. His name is Avedis; he’s from Armenia and runs LED Coating Solutions.
Avedis works on really high-end floors. He’s based out of New York, and he generously offered to fly out and help me with this project. Before he arrived, he gave me instructions on what I needed to do in preparation. The day before his arrival, he told me to wet everything down.

Using a pump sprayer, I sprayed water onto the surface and smoothed it out with a mop. For as long as I’ve been building furniture, I’ve used a similar process. Typically, you spray down a table with water and then when sanding, it leaves it even smoother than it was before. However, it’s important to note that this flooring process is completely different. The purpose of raising the grain is to make the surface slightly fuzzy, allowing the finish to soak in more effectively. And I know what you’re thinking: Won’t that make it rough? I’ll address that shortly.


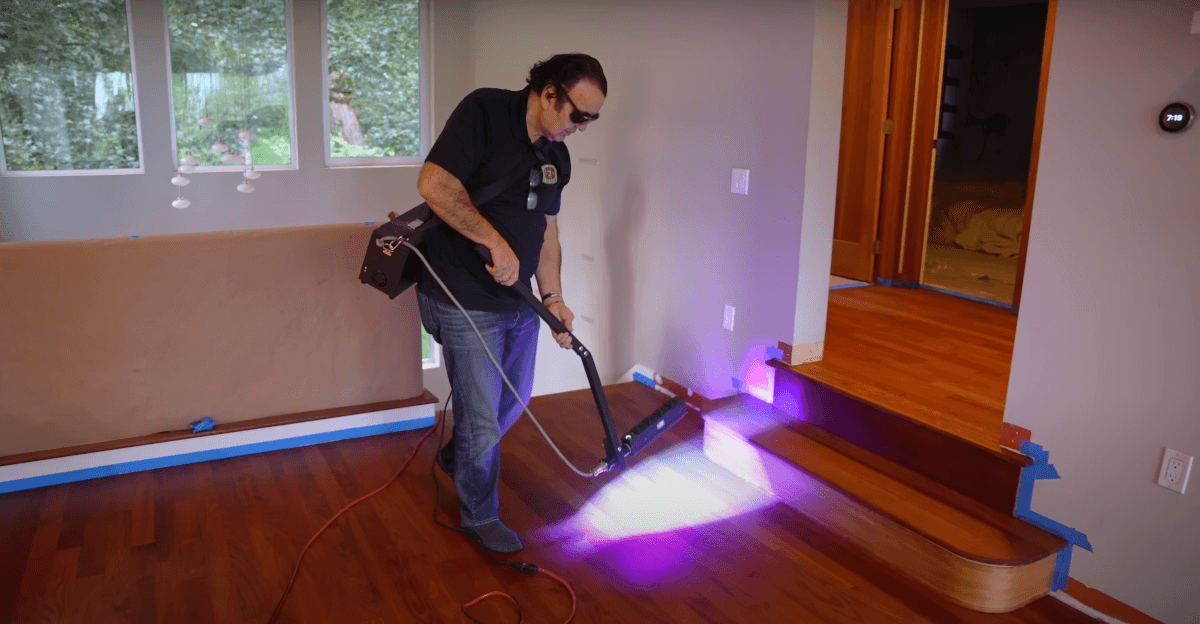
Now, my favorite thing about the finish I’m going to apply is that it cures instantly under UV light. That said, one of its biggest downsides is that it also cures instantly under UV light—meaning direct sunlight can be a problem. Ambient light is fine, but the finish can’t be exposed to direct sunlight during the process.
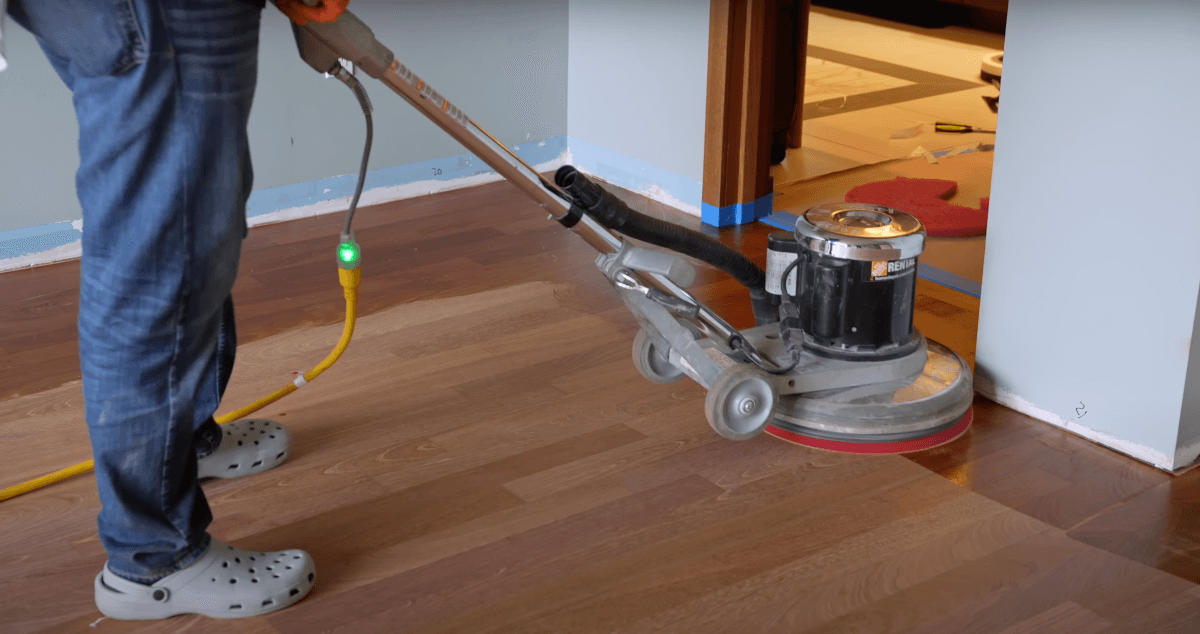
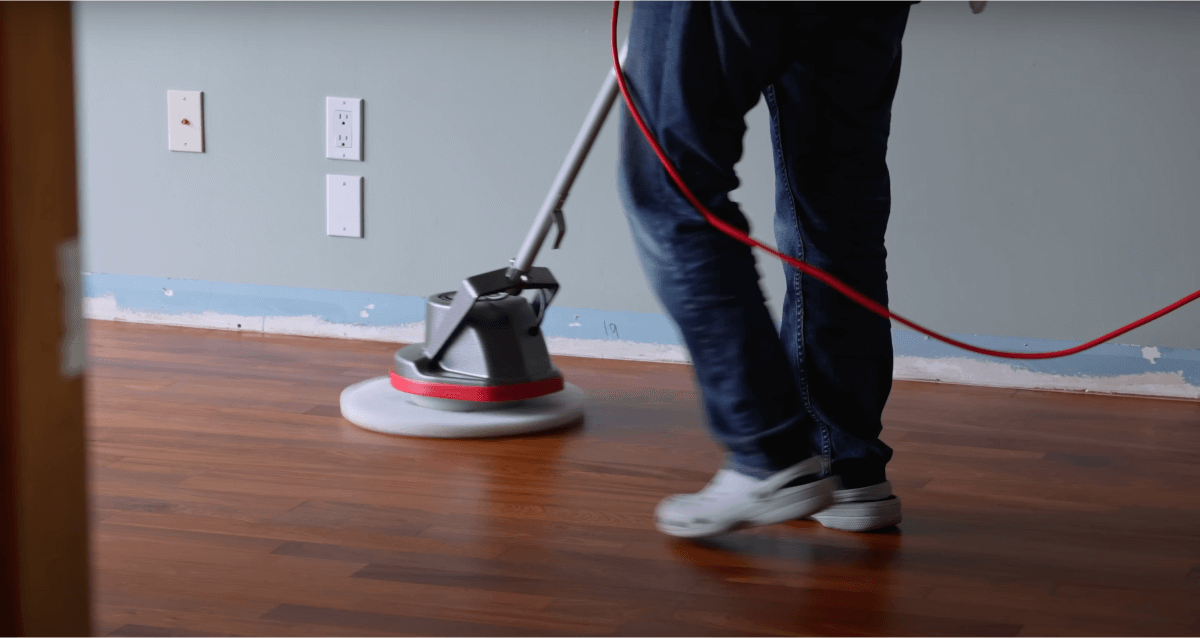
Of course, there are a couple of tools you're going to need to apply this finish. The most important ones are a floor maintainer or a floor buffer, which you can find at most rental centers. I believe this one is an 18 or 20-inch model.
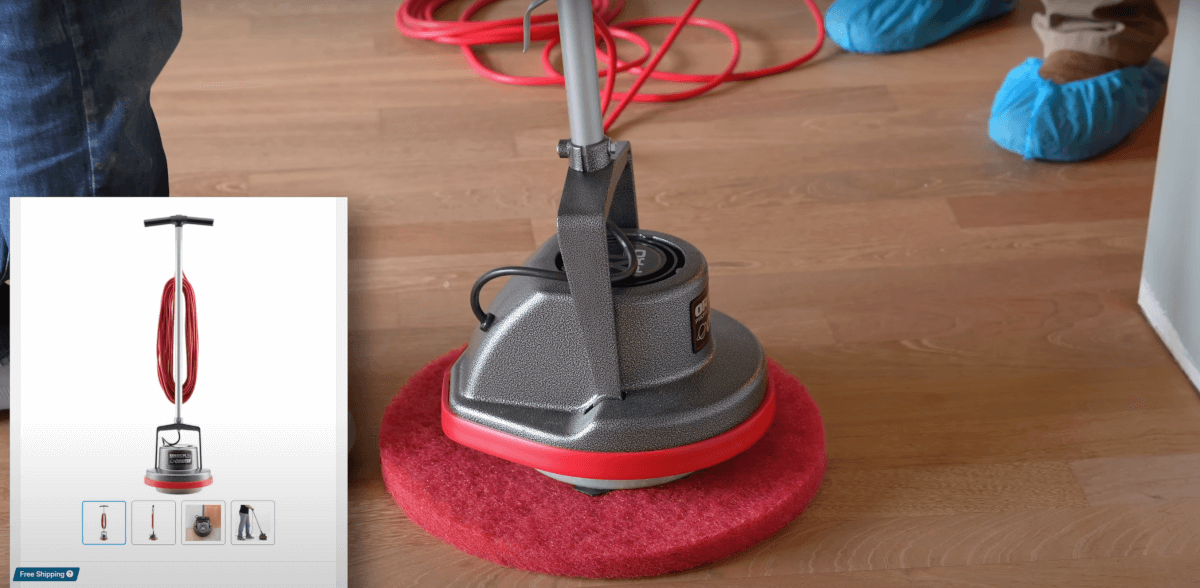
You'll also need a bunch of 3M red pads and 3M white pads. Don’t buy the ones from Home Depot. Avedis insists they must be 3M, and most importantly—according to Avedis—is this Oreck buffer... and there are a few reasons why this is so essential. First, it’s much lighter than the large floor maintainer. He mentioned that if you use the heavier buffer, you risk burnishing the wood, which could make it look inconsistent compared to the rest of the floor.


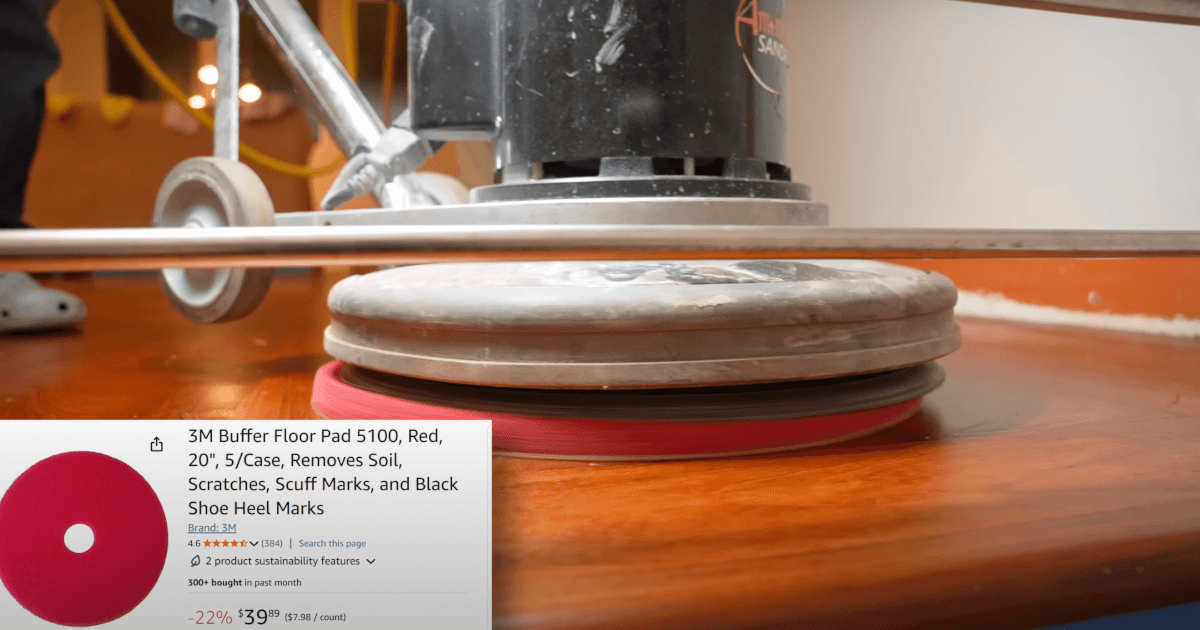

Even though the red pad does smooth out the floor, it doesn’t make it perfectly smooth—like glass, for instance, as one of my tables. It turns out that you actually don’t want your wood floors to be that smooth, as they would become too slick and difficult to navigate.
Oh, and Avedis also mentioned that you should wear Crocs while working. However, if you can’t find Crocs, alternatives can work in a pinch. You'll notice the alternatives I used were regular shoes with painters tape on the soles.
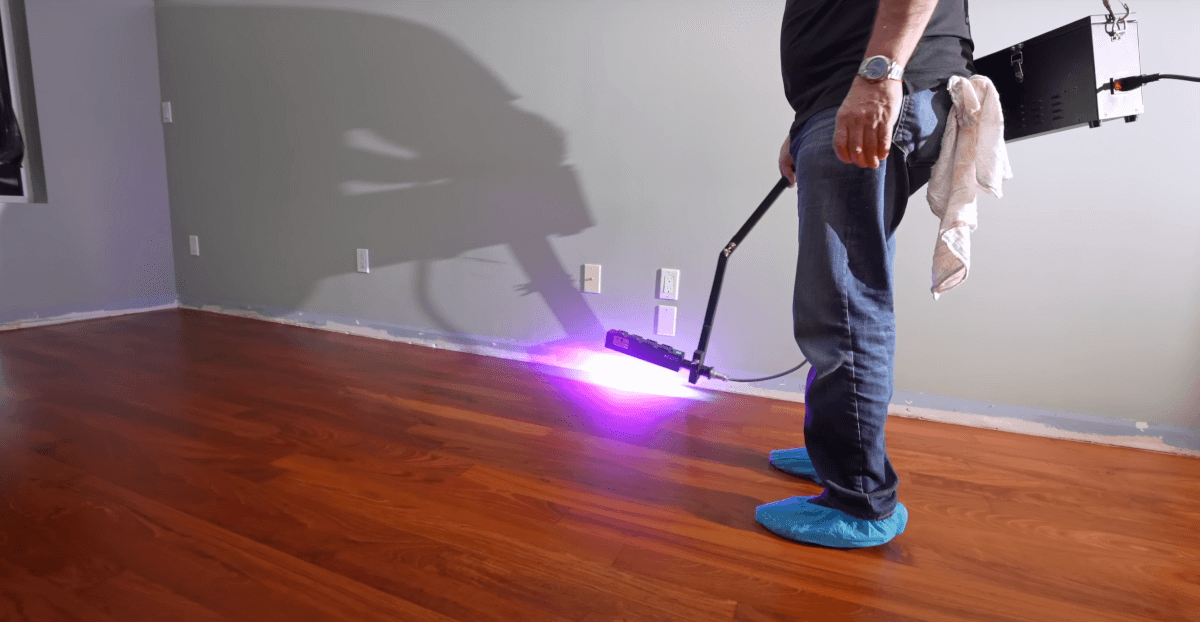
The last tool—probably the most important one—you’re going to need is a special LED curing light. I’m currently trying to convince Avedis to start renting these units out. As, unless you’re running a professional shop, it doesn’t make a lot of sense to purchase one yourself. They can be a significant investment.
The finish I’m using here is Vesting LED Oil in a clear satin. There’s no added color or stain whatsoever; it simply highlights the natural wood tone of this Brazilian cherry.
To apply this, we’re using a red pad to feather the oil into all the corners. Avedis is applying the oil with a roller, but that’s just to get the material evenly distributed. The roller isn’t essential—it’s simply a quick and efficient way to get the oil close to the walls.
Once the edges were cut in, Avedis used a heavy-duty floor maintainer with a red pad to buff the rest of the floor. The weight of the heavy-duty buffer generates heat and helps drive the finish deep into the wood. However, he pointed out that you need to be cautious with this buffer. If you let it sit on one spot for too long, the floor might get burnished, making that area look different from the rest.
I will note that Avedis seemed a little nervous—possibly disappointed—that I hadn’t covered up the windows before we began.
This made him nervous that it might prematurely cure. And if it's not clear why that's a big deal—if the sun were to prematurely cure this finish before we buff it off, it would basically look like I spilled a bucket of epoxy all over the floor. We'd then have to go right back to the sanding stage of this process.
Avedis has now switched to a clean white pad on that heavy-duty buffer. The steps so far have been: apply the finish with a red pad and the big buffer, wipe off the majority of it with a clean white pad on the heavy-duty buffer, and now for the final step, you'll just walk your way out using this Oreck buffer. What's so genius about this is that you have a big pad on a small buffer. That extra-wide pad diffuses the finish, which makes perfect sense. If you only used the heavy-duty buffer, it would create a sharp, defined line because of the weight. By contrast, the light-duty buffer feathers everything out, which is actually really smart.
It was getting pretty late in the afternoon, but some sneaky rays of sunlight were poking through the back side of my house.
We didn’t start applying finish until about 3:00 or 4:00 in the afternoon. I was pretty stressed throughout this, while Avedis, on the other hand, was cool as a cucumber. He kept telling me that as long as the sun doesn’t cure the finish prematurely, we can’t mess it up. One really helpful tip he gave me is that the longer the oil sits, the more it soaks in. So, as long as it’s still completely wet, it hasn’t begun to cure yet.
What we’re doing here is applying the finish everywhere, letting it set for about an hour. After we finished getting everything on and wiping it off, we just went to dinner and let it sit for over an hour. This way, by the time we came back to apply the light, the finish had reached its maximum amount of penetration.

If you haven’t seen this before, this is the part that’s going to blow you away because the finish is completely wet. But after about 1 or 2 seconds with that light, it becomes perfectly safe to walk on and is completely cured. And to clarify—when I say “cured,” I don’t mean it’s sort of dry, safe to handle, or that you should take it easy for the next couple of days. Nope—it’s DONE. It’s FULLY cured. This is absolutely mind-boggling in the wood finishing space.

However, we aren’t done yet because finishes like this require two coats. Even with Rubio Monocoat, which markets itself as not needing a second coat, everyone I know who has ever used it ends up applying at least two coats. It’s basically just a marketing term. Anyway, I digress.
We’re applying a second coat, but before doing so, we’re buffing the entire surface with a red pad to remove the majority of the dust. Unlike poly finishes, which need to be completely dust-free, this one just requires removing the majority of the dust—it doesn’t need to be perfectly sterile.
Applying the second coat of finish is just like the first coat, except that you use much less product. You’ll probably use only 10–20% of the amount you used on the first coat.
So, we buffed on the finish, buffed it off, and cured it instantly with the light, just like before.
At this point, I was physically and mentally exhausted, but we’d really only been working for about seven hours.
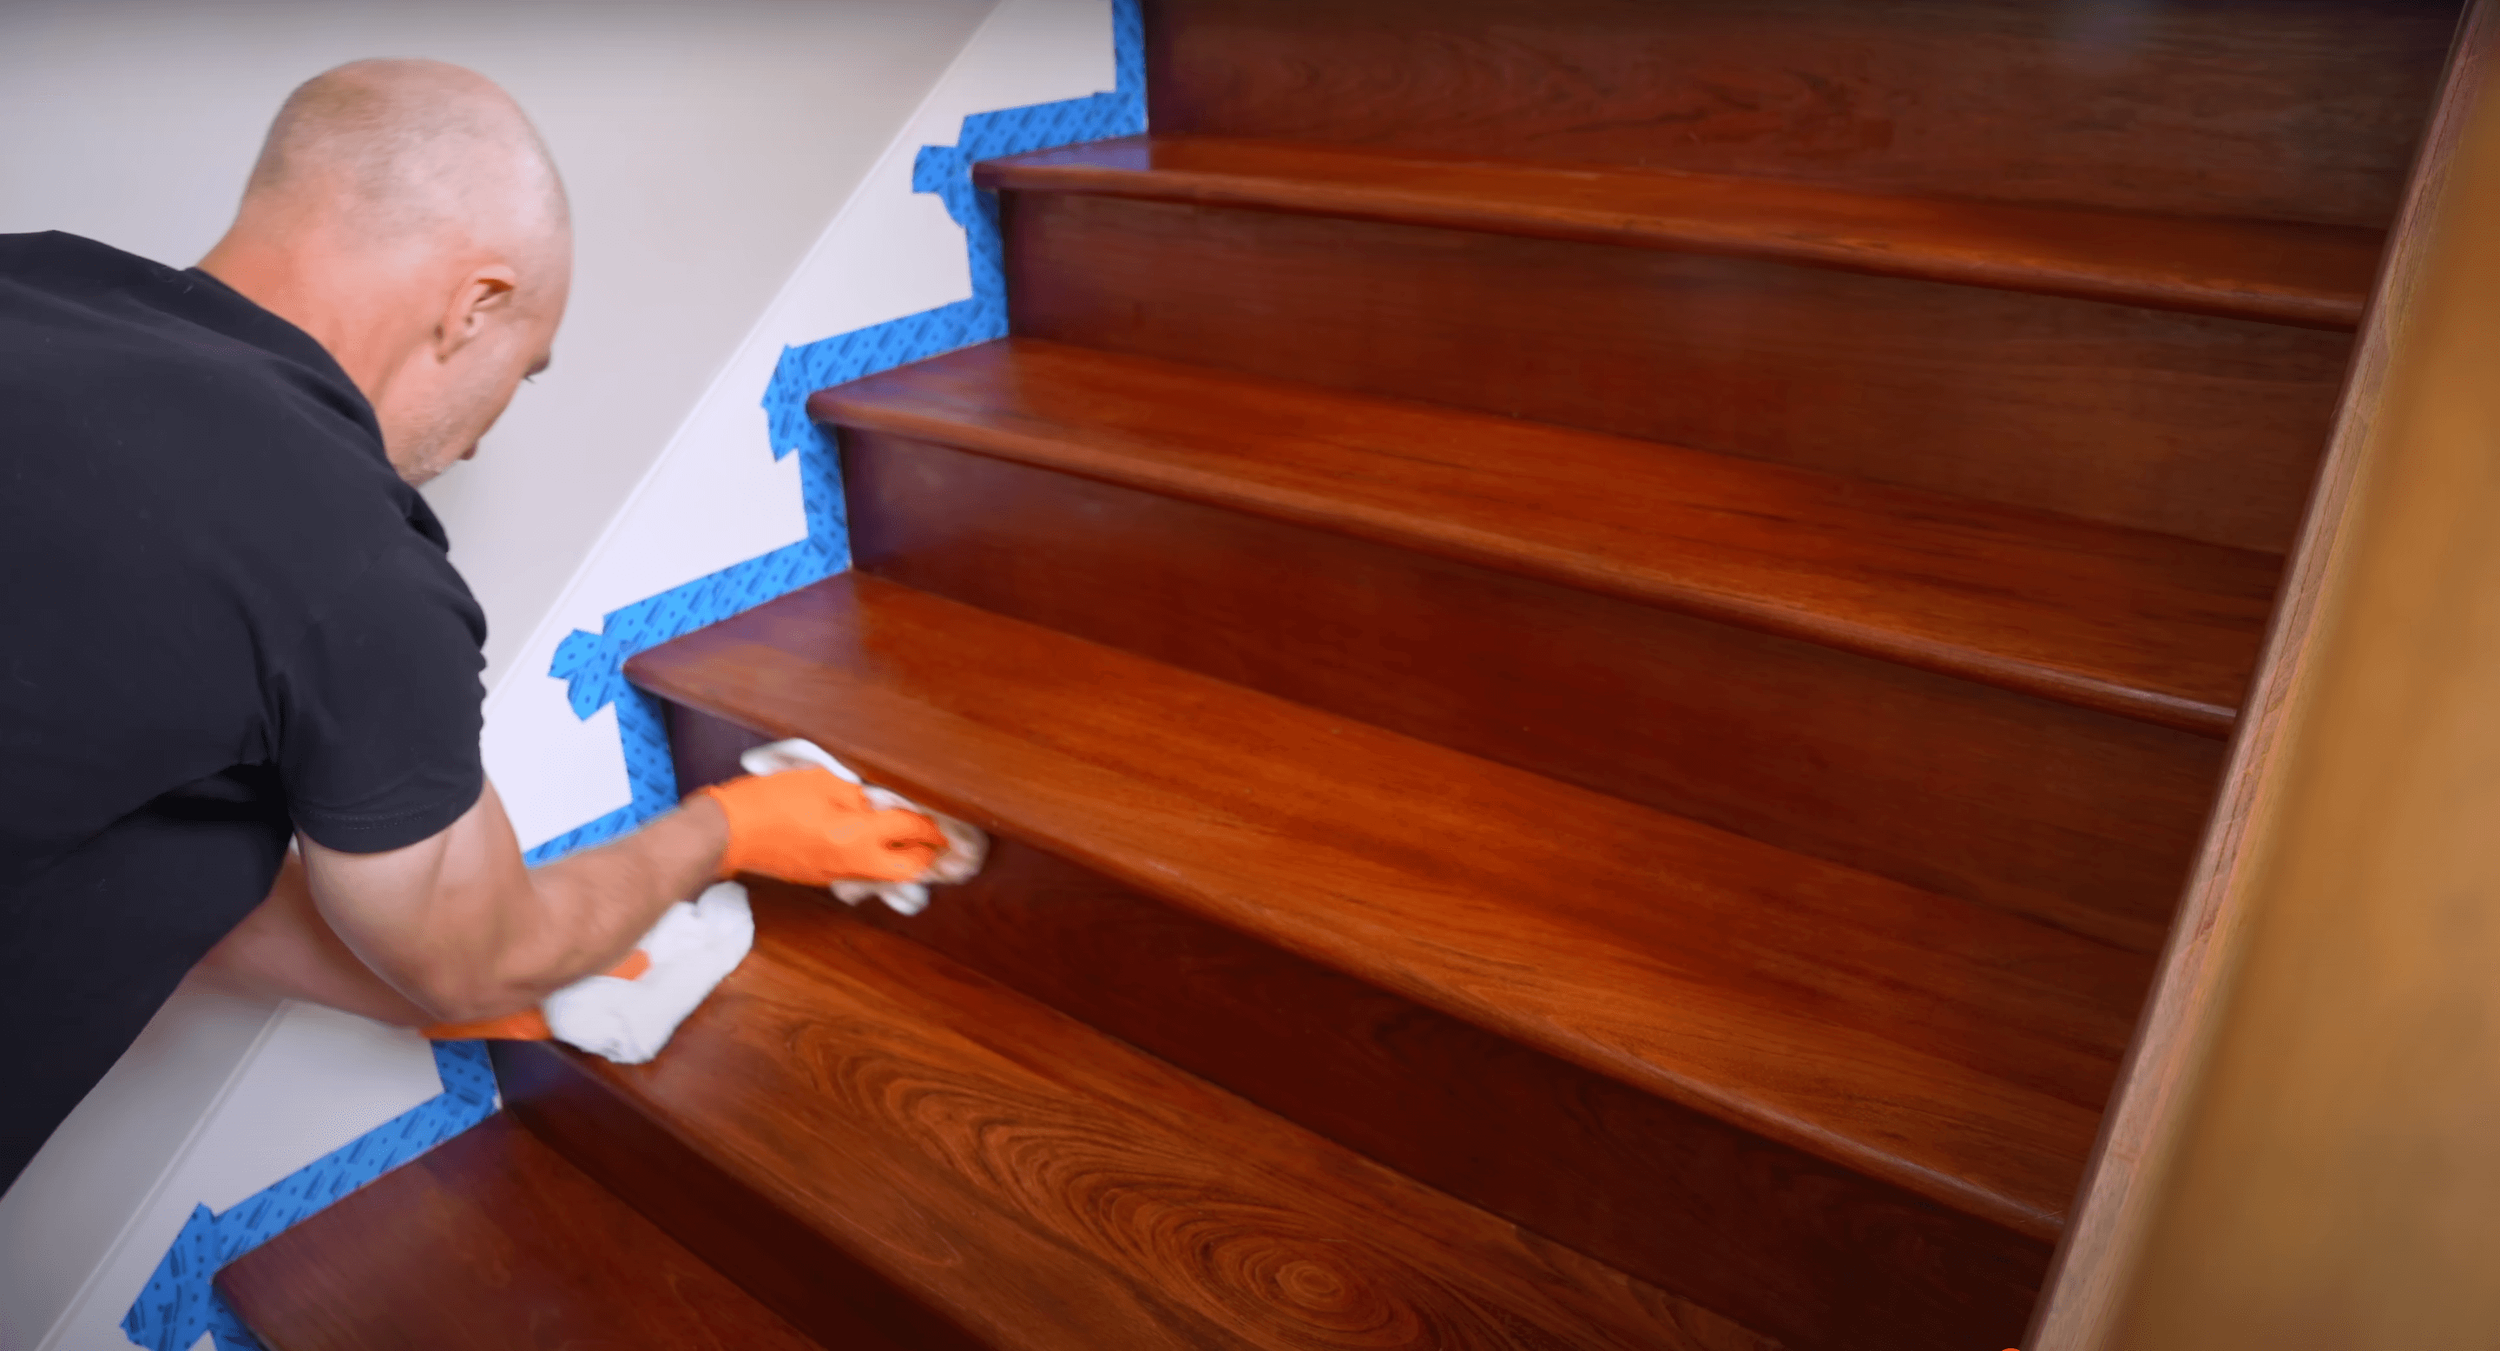
To finish an entire upstairs, fully cured and ready to move furniture in within seven hours, is pretty impressive. This is how it looks in the end, and I cannot overstate how amazing it looks now.


I also can’t overstate how bad it looked before. I know it doesn’t look awful on camera, but in person, it was so much worse. Anytime light hit it, it looked absolutely terrible. I can honestly say this is the nicest floor I’ve ever seen in person. I can’t imagine using any other finish.
… and, of course, a big thank you to Avedis.

