How to Make an Epoxy Resin Table
Materials & tools used to build this live edge epoxy table
Depending on how much time you want to spend, or money you’d like to save, some of these tools can be omitted or substituted one way or another. So don’t think you MUST have everthing on this list to make a resin table. I will say, they do make it easier.
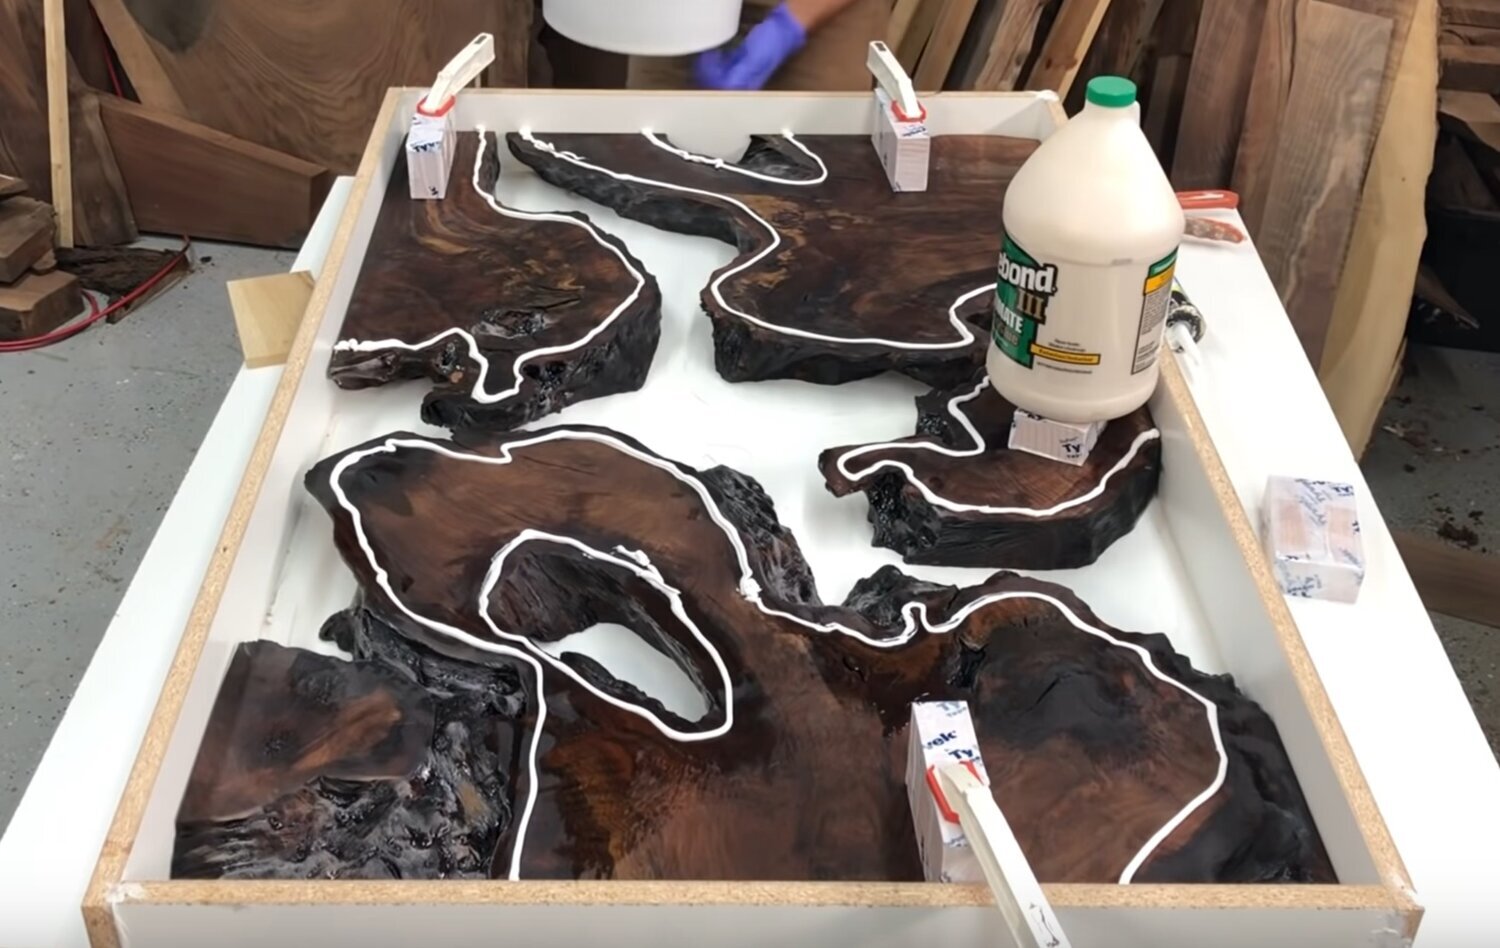
Choosing your layout
I always start my project by building a template to help me visualize my finished table. Your template doesn’t need to be anything fancy. I generally use some old 1x1” scrap I have laying around. For the best visualization, build your template so that the inside of the template is the size of your finished table.
Once you have your template, take your time choosing a layout. Even if you think you know exactly how you want it orientated, take a few minutes and play around with other ideas by moving your slabs, flipping your slabs, or adding in other pieces just to see what it will look like. You may surprise yourself. I have no shame and do this in my slab suppliers showroom. I got a few funny looks the first couple times I did it, but now they are used to me.
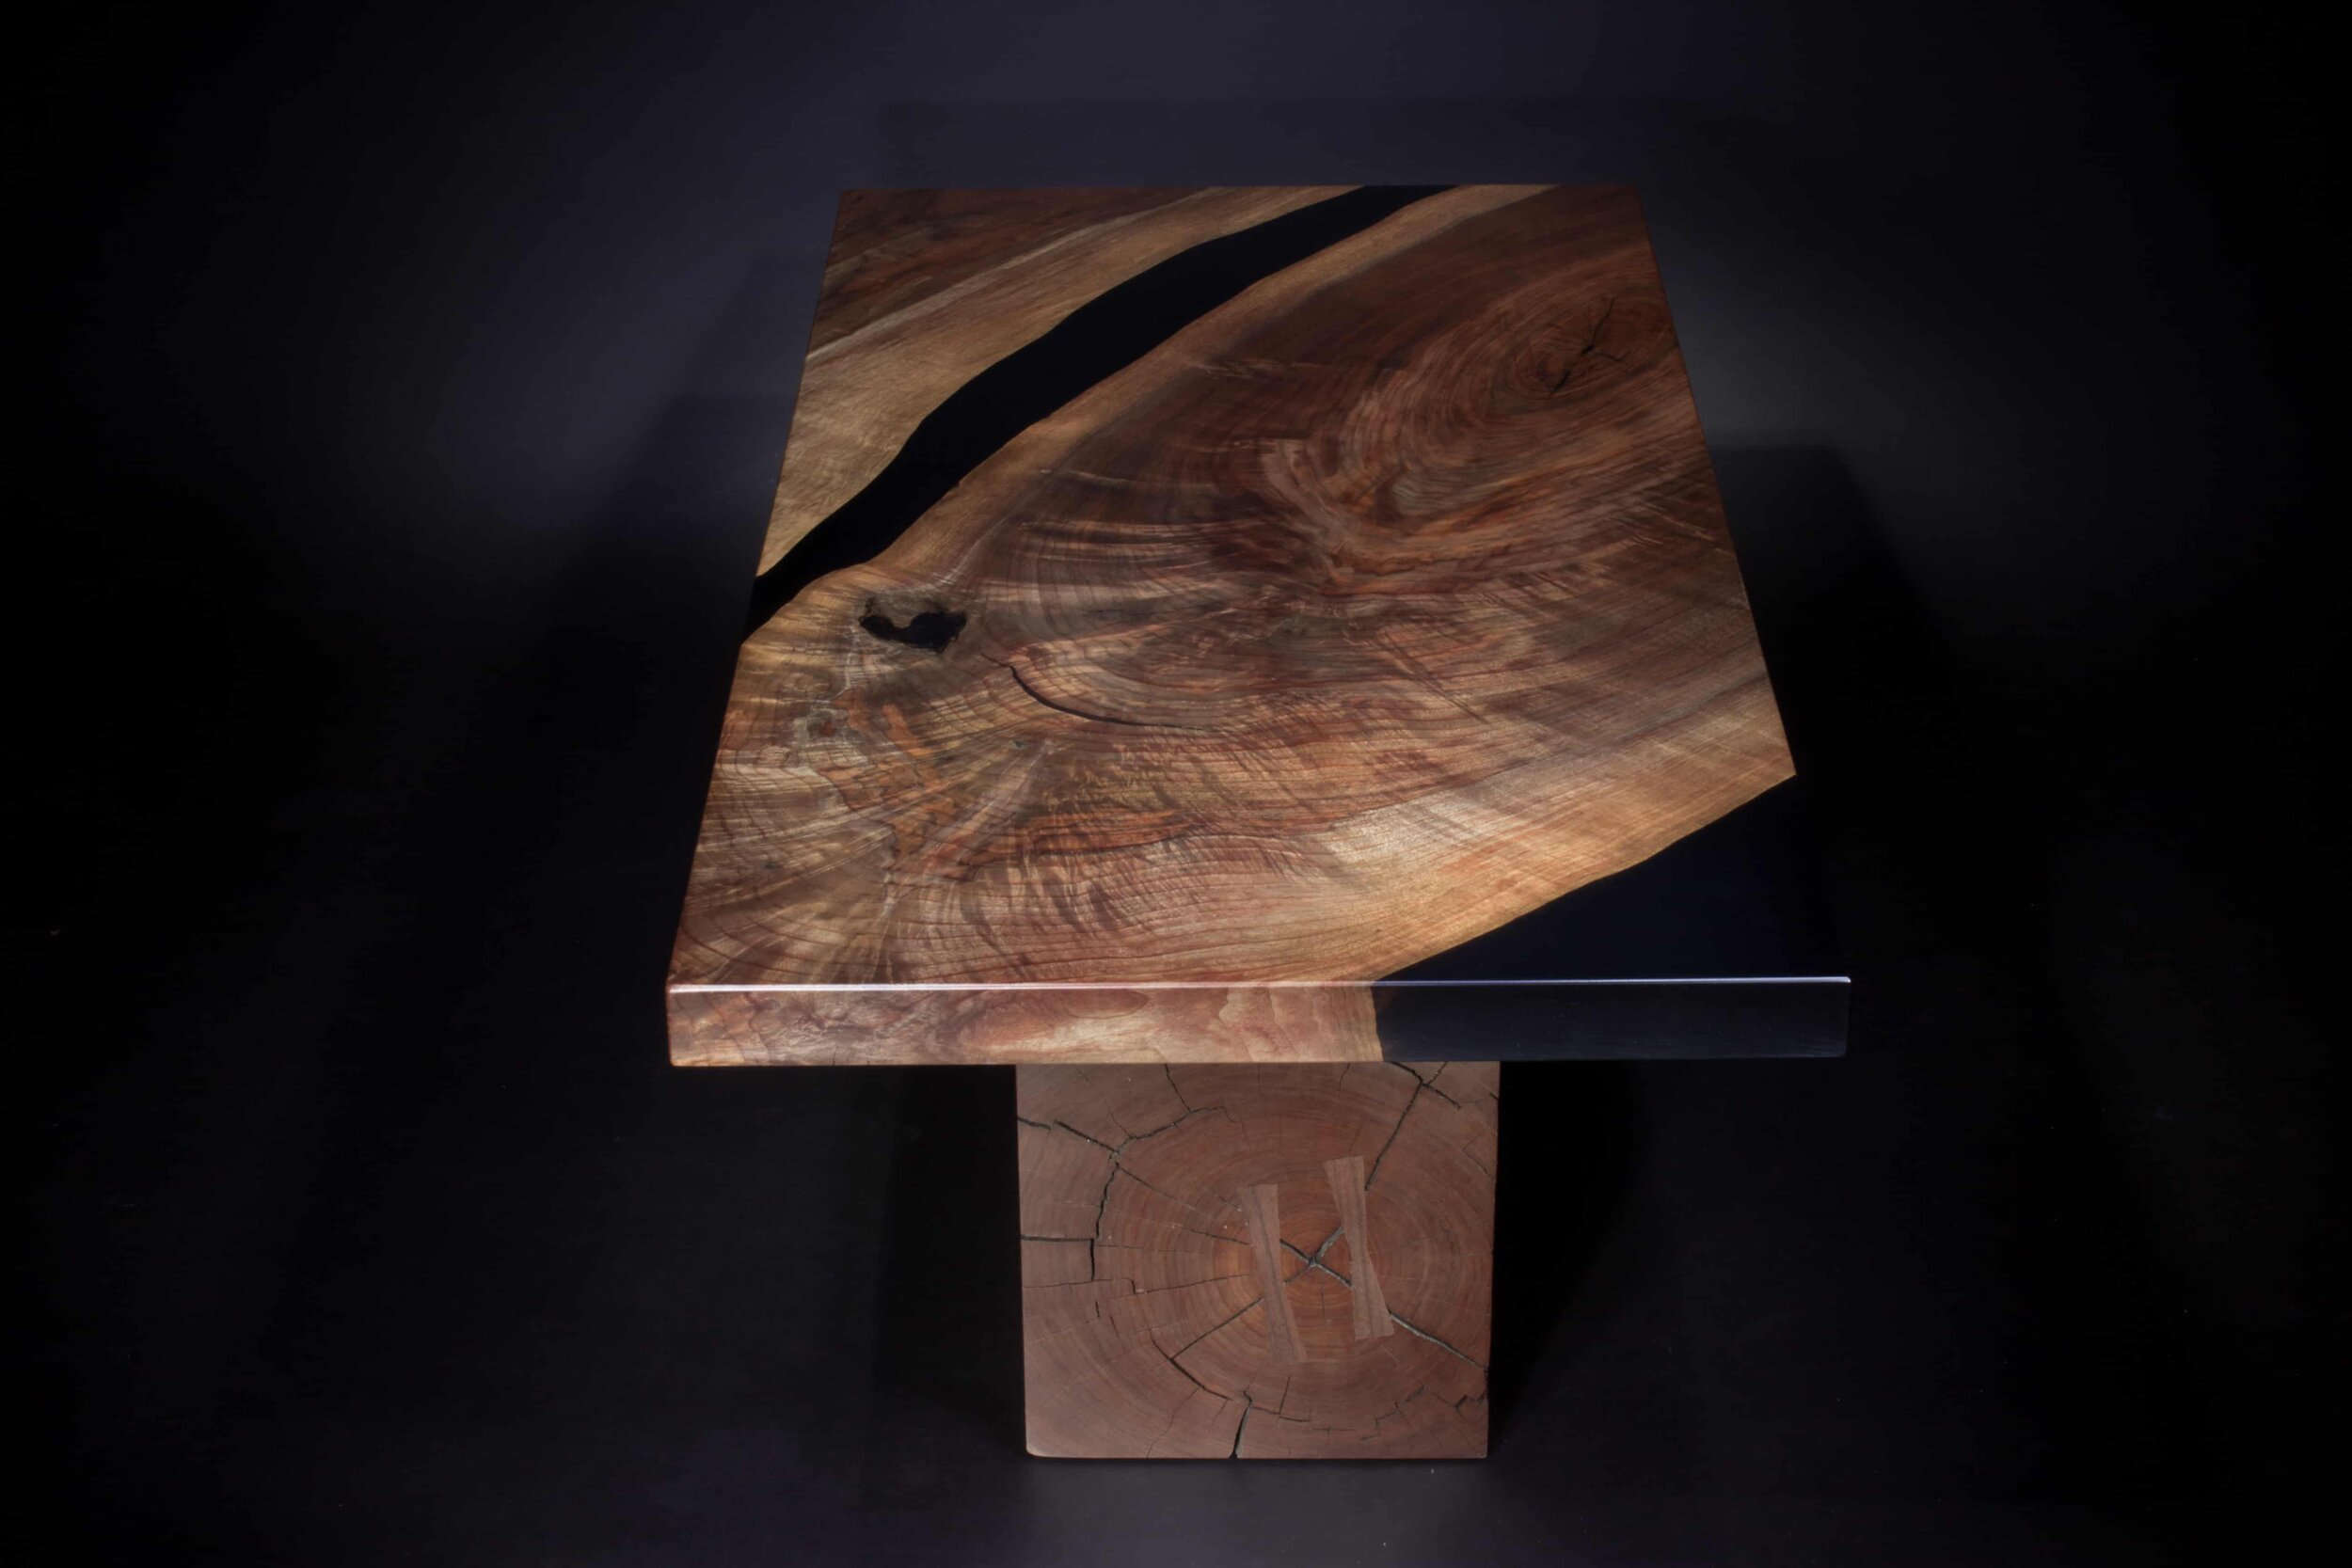
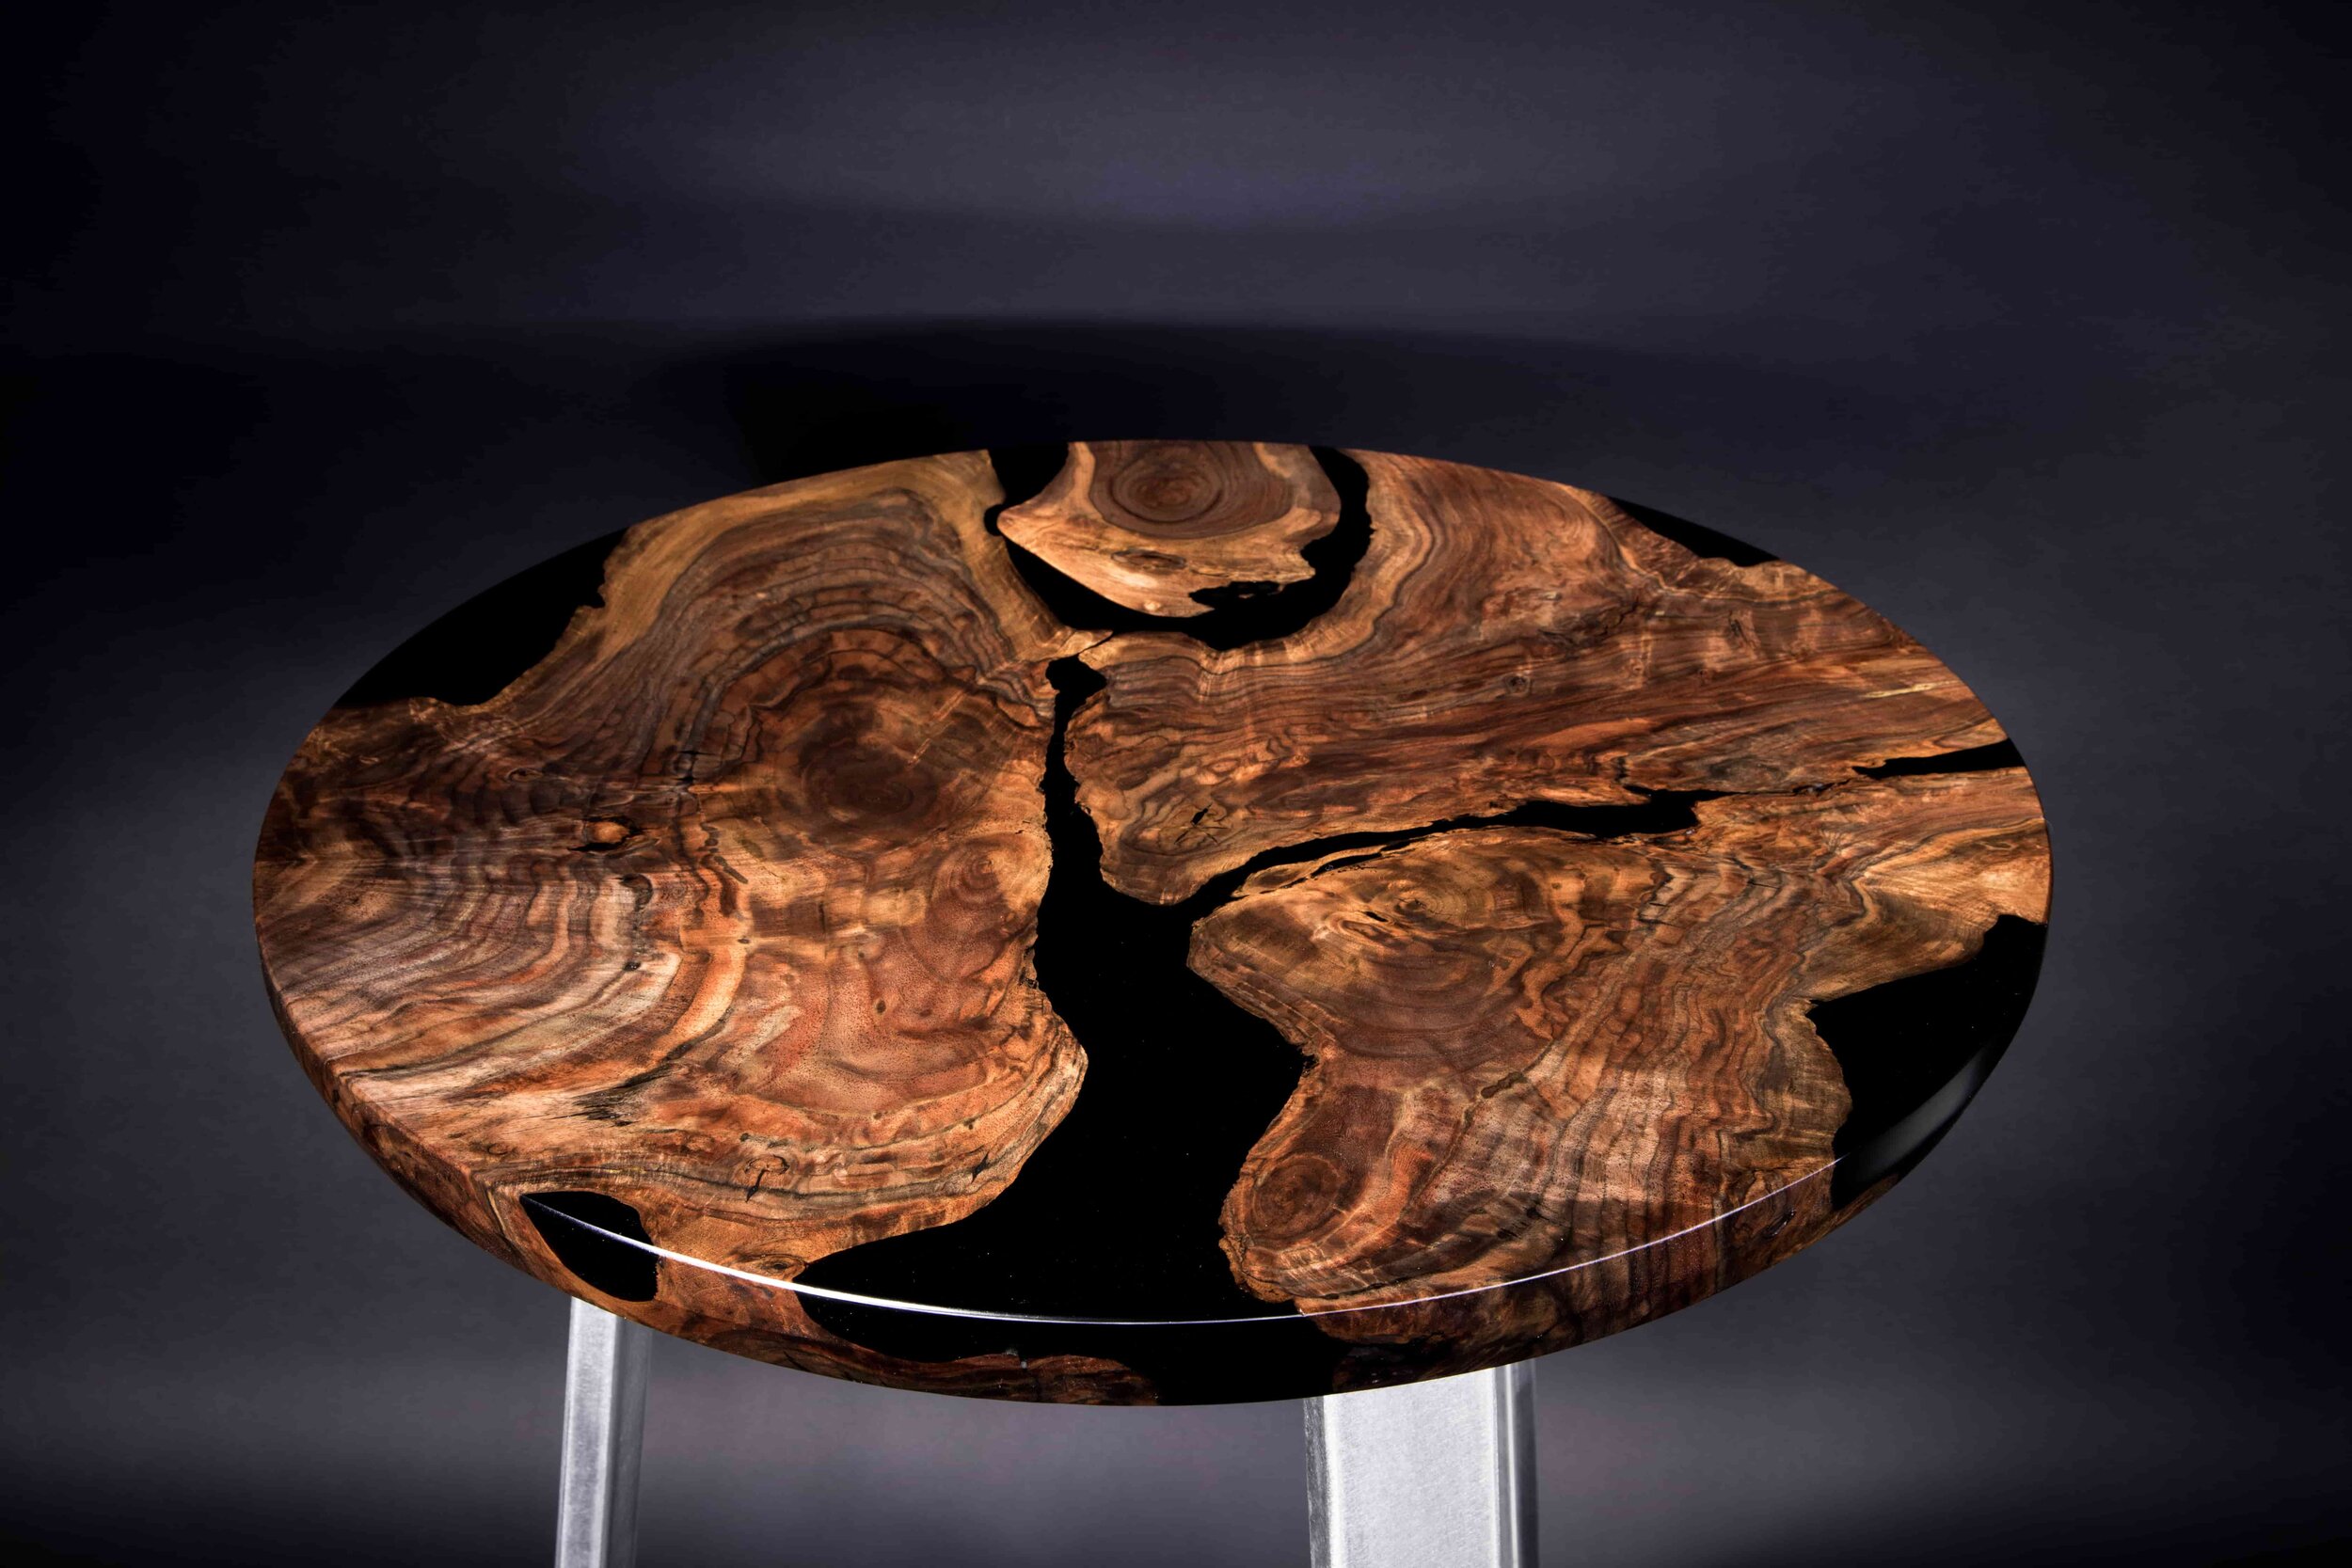
Avoiding those straight edges.
I have one main rule for picking an amazing layout. No straight edges. Why? Because trees don't grow perfectly straight edges, and rivers don’t flow perfectly straight. When we build one of these tables, we are trying to mimic nature the best we can. And a section where the sawyer cut a limb off, just won’t look right. You may think you can just add your own natural edge by carving it to replicate a natural curve. However, In my opinion these never look right. The reason is, all natural curves of the tree have corresponding natural curves in the grain. If we try and mimic the curve with no corresponding grain, it will look like we faked it, which we did. This can be a pretty big inconvenience, especially if you only have one or two slabs and they both have straight cuts on them.
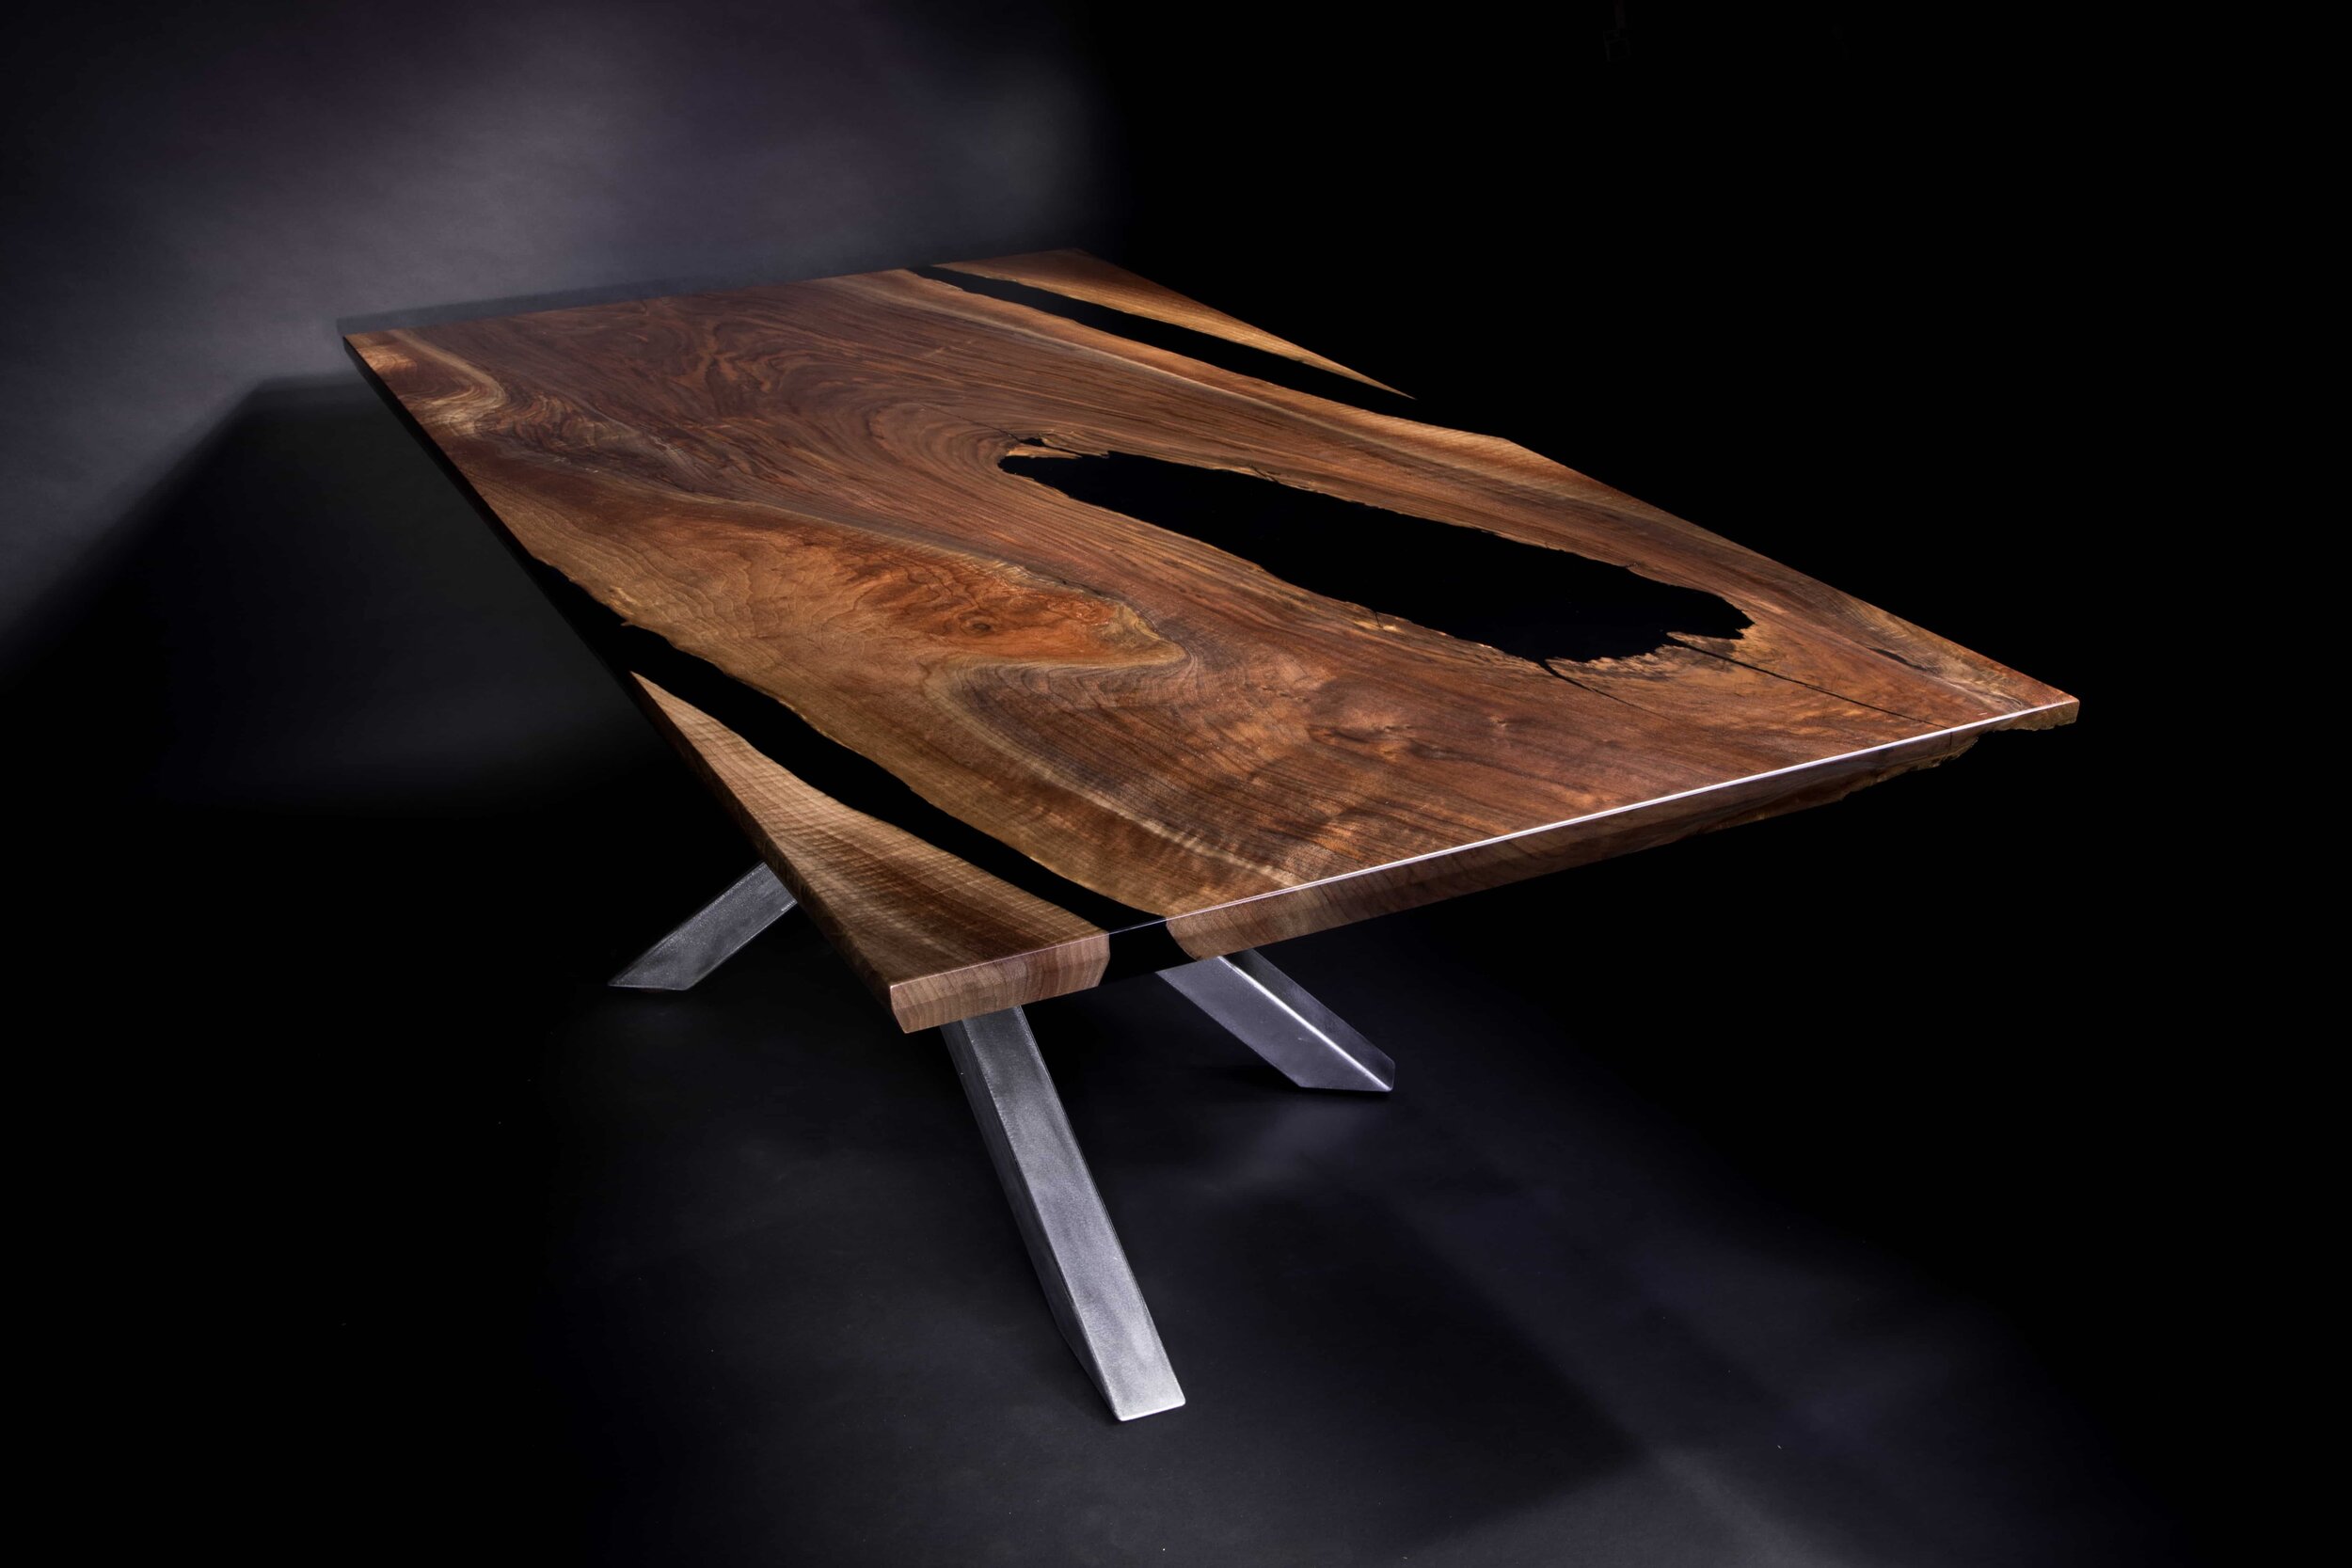
Other than avoiding straight edges, I don’t have any hard and fast rules. I don’t like huge areas of open resin if I can help it (looks funny and gets expensive). So ideally I like to match one curve in with another piece curving out at around the same area. This way it most naturally mimics a true river. If you get stuck with your design, I’ve gotten inspiration in the past by searching aerial images of real rivers. This can be particularly helpful when adding islands in your river or other fragments to mimic a bay for instance.
When your layout is finalized, mark your shape on the slabs with chalk or pencil. I mark my lines 2” over on the length and width. That way I have one inch room for error on each side. I am required to get my clients measurements exactly right. If you or your client can handle a little undersized, you could chance making your marks a little closer to the final size.
Cutting the slabs to size
I have a pretty good shop for a one-man operation. So I’ve been fortunate enough to purchase some tools that your average DIYer wouldn’t be able to justify. One of those tools is a Festool track saw. While it makes certain jobs like cutting these slabs to size a lot easier, it isn’t a must-have. I would consider some sort of circular saw a must have though. You could potentially do this with just a jig saw or even a handsaw, however It would be much more difficult.

Whether you are using a jigsaw, track saw, or regular circular saw, just cut along the lines you marked. Don’t worry about making these absolutely perfect. The table will be cut down to its final size after pouring the epoxy. However, the cleaner and straighter you can make these cuts, the less epoxy you will end up wasting.
Cleaning up the slabs

Softer wood is often lighter in color
You want to make your table with only good, hard wood. No soft or rotted wood. Unfortunately the really cool pieces for tables like this often have rotted spots, big knot holes, or other parts that need to be addressed. The good news is, when working with epoxy, you can always fill a void or low spot with resin.
For the bark and really soft spots, a dull chisel and hammer is all you need. Just go to town until you get the bulk of it off. My favorite tool for cleaning up slabs is an angle grinder with a stainless wire wheel though. One reason I love the angle grinder and wire wheel, is that it removes all the soft wood, and leaves all the hard wood. I also use smaller nylon wheels attached to my drill for the hard to get spots. The Porter Cable Restorer is actually a really good tool for the money as well. Their stainless wheel is aggressive enough to get the rotted wood out. While their nylon wheel is delicate enough to remove light stuff without even marking the wood. FYI, the stainless wheels on the grinder and restorer will leave light marks on the wood.
I have heard that blasting with walnut shells is the best way to go, but that is one tool I haven’t been able to add to the arsenal yet.
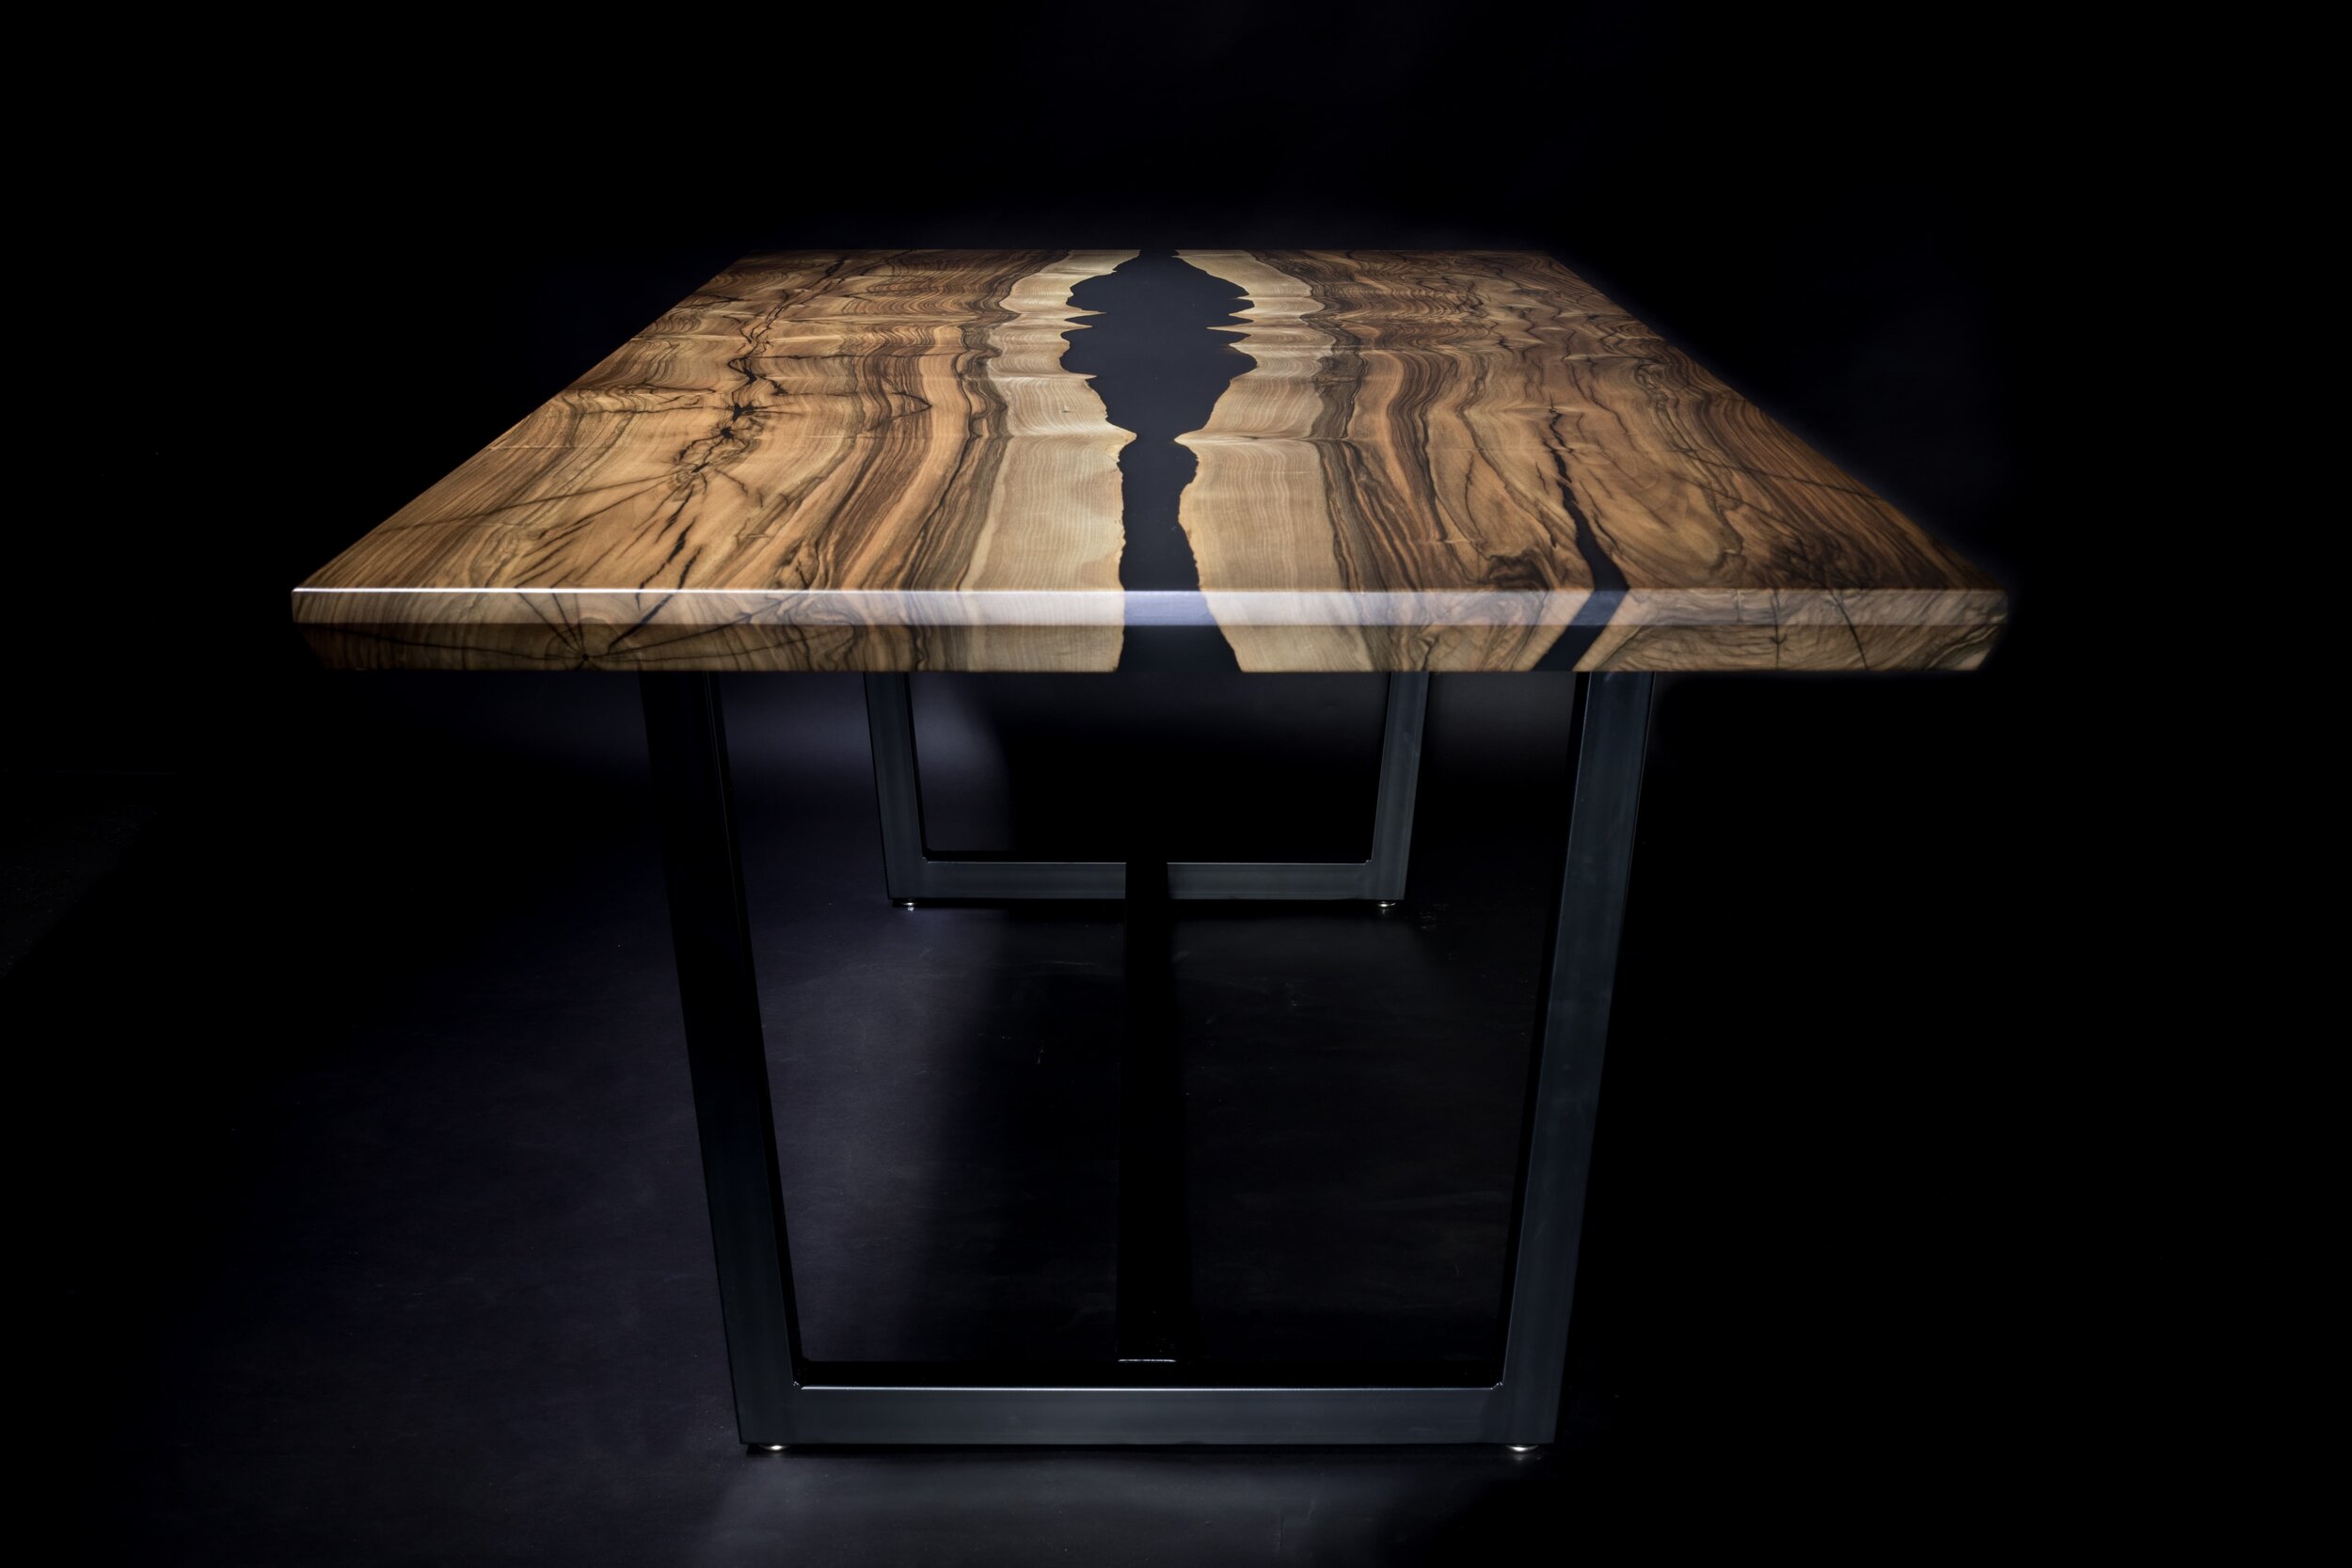
Sealing your edges
This step is up for a bit of debate. I’ve talked to some very good resin table builders that opt to skip this step. However, I always seal my edges. The main reason for not sealing your edges is that you can get a better bond without sealing. As the resin has a chance to really penetrate the wood as it cures. The main reason for sealing the edges is that you prevent any staining that can happen from dyed resin penetrating the wood. Especially lighter woods. Powdered pigments won’t stain nearly as bad as liquid dyes if you decide not to seal your edges. Another benefit to sealing your edges for transparent tables is that you will get far less bubbles in your epoxy. There is air trapped in the raw wood, and if you do not seal your edges that air will come out and remain suspended in the finished epoxy pour. You’ll often hear of people having problems with “micro-bubbles.” Sealing will greatly reduce the number of micro-bubbles.

One or two coats are necessary
I have modified my sealing method in the last year or so. I worked with the people at Liquid Glass epoxy to come up with a method to get the bond of not sealing your edges, with the protection of sealing the edges.
I seal the top, bottom, and sides completely with the same deep pour epoxy that I use in my river portion. Generally with a disposable brush or foam roller. Nothing fancy here, just coat the entire piece(s). I then let that epoxy begin cure for around 12-18 hours. At this point, the epoxy will be partially set up and sticky, but not hard. Meaning it is cured enough to prevent staining and seal in the air, but sticky enough we can still get that good “chemical” bond. Unlike my previous method of sealing with epoxy, letting it fully cure, scuffing lightly, then pouring. Which is referred to as a “mechanical” bond.
You do need to time this carefully though. So I recommend having everything else ready for your pour prior to this step.
… and if you need a great self-leveling table top epoxy resin, I do recommend Superclear Table Top Epoxy.
Building your epoxy table form
I make my forms from melamine. It's pretty cheap, readily available from Home Depot, and I can usually get 2-3 tables out of it before having to throw it away.
All you need to do is build a box the size you want your finished table, plus whatever cushion you added in. If I wanted a finished table 96x42”, I’d have cut my slabs 98x44” and build my box to fit that 98x44.” I add at least 2” to my sides over the thickness of my slabs. So if my slabs are 2” thick, I’ll cut my sides 4” tall.
I highly recommend adding fast dry caulk to all edges when assembling your box. This makes it aquarium tight, and will greatly help with preventing any leaks. I suggest using caulk over silicone or construction adhesive. Those can actually work a little too well. And can make taking your form apart next to impossible. After caulk I will attach with construction screws using a pilot hole and countersink. This will help with disassembly. Now go back and add a seam of caulk on all edges and corners. Press your finger in and drag it along, just like you would do adding caulk to your bathtub. A good tip is to wait overnight before pouring any epoxy. This will ensure the caulk is dry enough to do its job.
Adding mold release
Always add mold release, don’t skip this step. I’ve heard of people using wax or other substances with success. However, mold release is designed to be used with resin, and will never react with it. So I don't take any chances here. The one exception I will allow for is using the house wrap tape. Tuck tape in canada, Tyvek tape in the USA. Resin won't stick to the house wrap tape, and you should be fine without mold release. I still prefer not to use tape, and just add the mold release. The tape leaves little lines and creates a little more resin waste underneath the slabs. If you use mold release, just make sure to get one compatible with epoxy, I’ll include a link of one that will work with any resin. Applying the mold release is pretty easy, but there are a couple things to know. The spray is very fine and stays airborn a long time. So I cover my wood to be used, or spray in another room. You definitely don’t want the spray anywhere near the wood. I apply two coats. Each time I’ll let the mold release sit for a few minutes, then work it in with a paper towel to make sure its completely covered.
Caulk dam in place
Epoxy resin time!
Quick tip on epoxy before starting. The resin (part A) can “crystalize” if exposed to cold. No matter what manufacturer you are using. What happens is the part A liquid crystalizes and basically becomes partially or completely solid. Don’t worry too much though! There is an easy fix. All you need to do is to submerge (half way up is fine) the sealed container in warm water for an hour or so. I use a shop sink, but a bathtub would also work. This will liquify your resin again, and be good as new. Since you may not know if your resin has crystallization at the bottom of the container, I do the warm water trick on every container I buy.
What epoxy do I buy?
I’ve tried lots of different brands, and am always evaluating the newest and best resin I can find. This deep pour resin world is still a pretty new medium. So epoxy companies are constantly improving and tweaking their formulas. Lately, I generally use Liquid Glass epoxy. It cures super hard, super clear, yet has enough flexibility to not risk separation from the wood due to seasonal expansion and contraction. I would be nervous pouring over 2” with any epoxy. But I have gone up to 2.5” with the liquid glass with no problems. Other epoxies I’ve used are limited to 1.5-1.75”.
How much epoxy do I need?
This is a big enough section I have since written a whole blog post on the topic. I also have a link to full video in the blog. Check it out here: https://www.blacktailstudiopdx.com/blog/epoxy-volume-calculation
To get a close estimate of the amount of epoxy you will need, you’ll need to do a volume calculation. Take width measurements every five inches down the length of your river. Then divide by the total number of measurements taken to find your average width. Now measure the length of your river. Then measure the height of your slabs (use the shortest one if they are different thicknesses). Now we have what we need for a LxWxH volume calculation. I punch these numbers into a volume calculator that takes inches in, and gives liters out. So if my river for my 98x44x2” table was 4” wide, 105” long (around the curves), and 2” tall. I’d need 13.77 liters.
There is some waste as well though. I plan on losing 1/8” (.125”, 30mm) under the entire table. So for the above example of a 98x44” table I would calculate 98x44x.125 which equals 8.8 liters of epoxy that is going to get wasted by seeping under our slabs. Which sounds like a lot, and it is. I have tried to prevent this in the past by caulking under my slabs with no luck. So any more I just factor it into the cost.
There is one more area we need to account for. That is the perimeter around our wood. Which is generally at least an 1/8”. So you will need to add the length of your perimeter together. 98+98+44+44=284”. Now add 284, 2(slab height), and .125 (width between wood and mold) into your volume calculator. Which equals 1.16 liters we need to factor in.
So the total amount of epoxy we will need for this example pour is 13.77+8.8+1.16=23.73 liters.
Here is a good link for calculating volume
Mixing your resin
Paddle mixer and a big stick
Once you calculate how much epoxy you are going to need, go ahead and mix in part A and part B in a bucket large enough to handle all of it. I measure my parts with a graduated bucket from Home Depot and then pour into a 5 gallon bucket. I like the plastic paint mixers that attach to your power drill best. They clean up easy and mix very well. Use a long stick to scrape the sides and bottom as you mix. Avoid getting the paddle near the top as that will induce more bubbles. I recommend mixing at least four minutes on low speed.
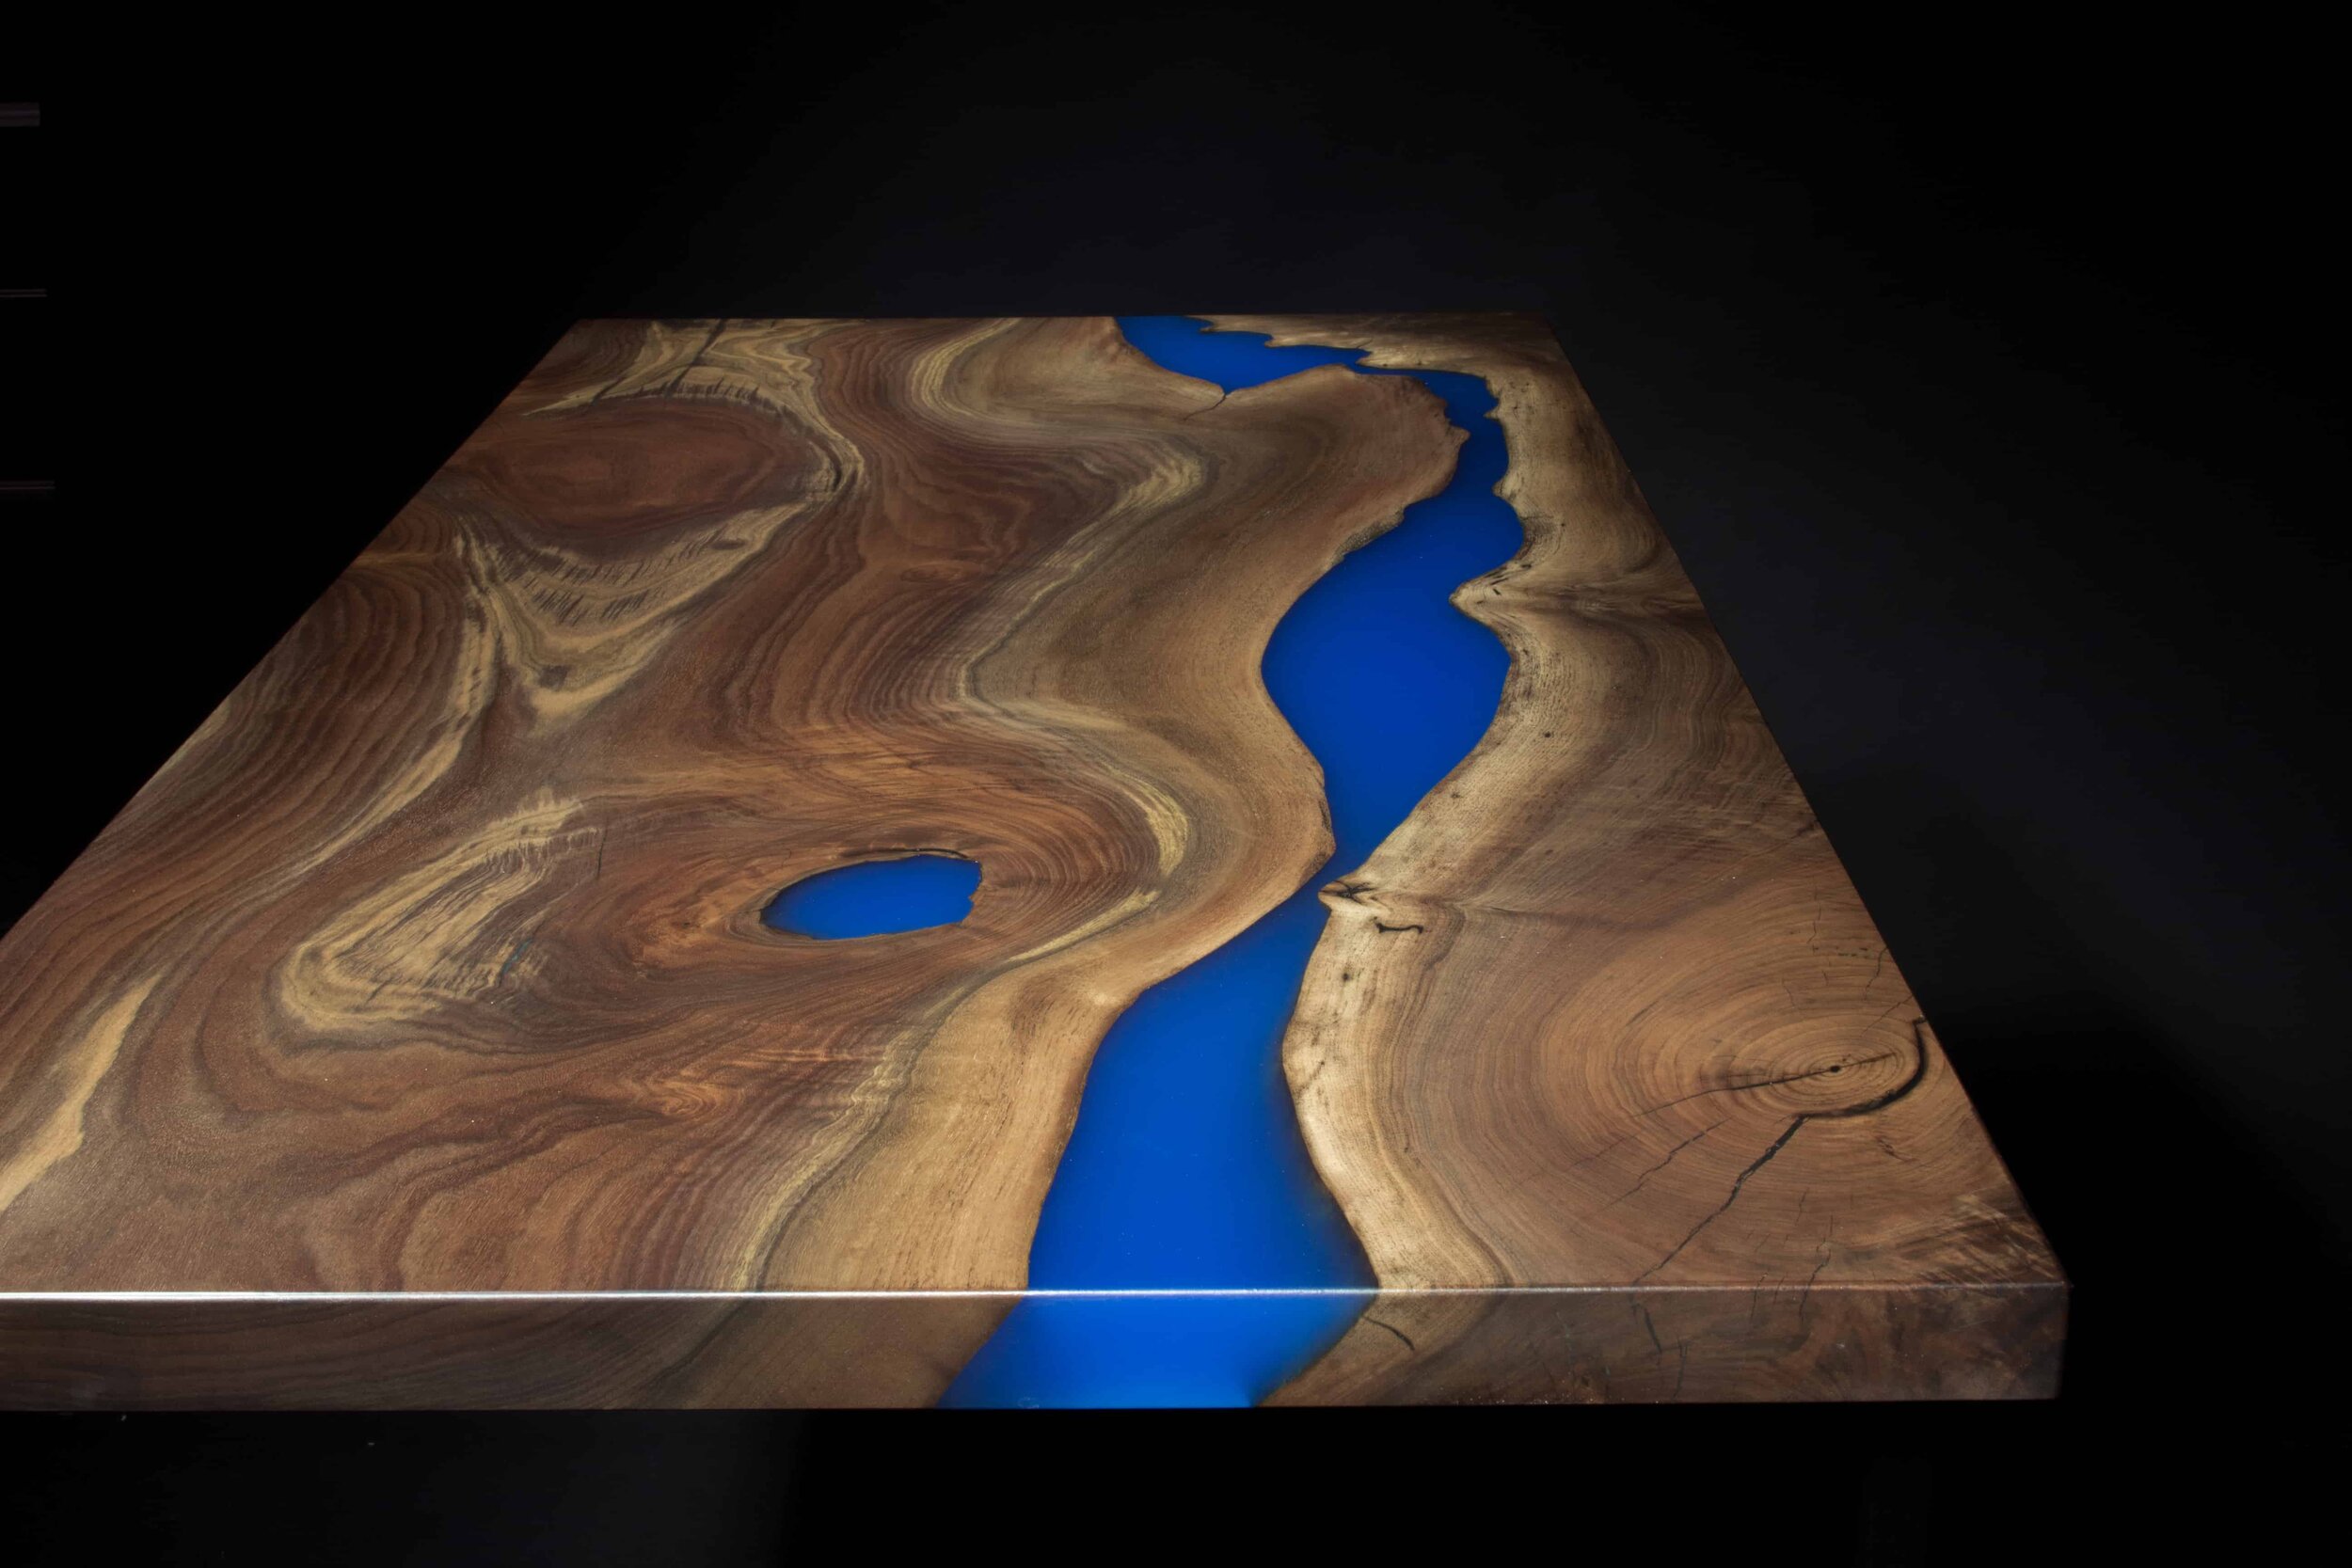
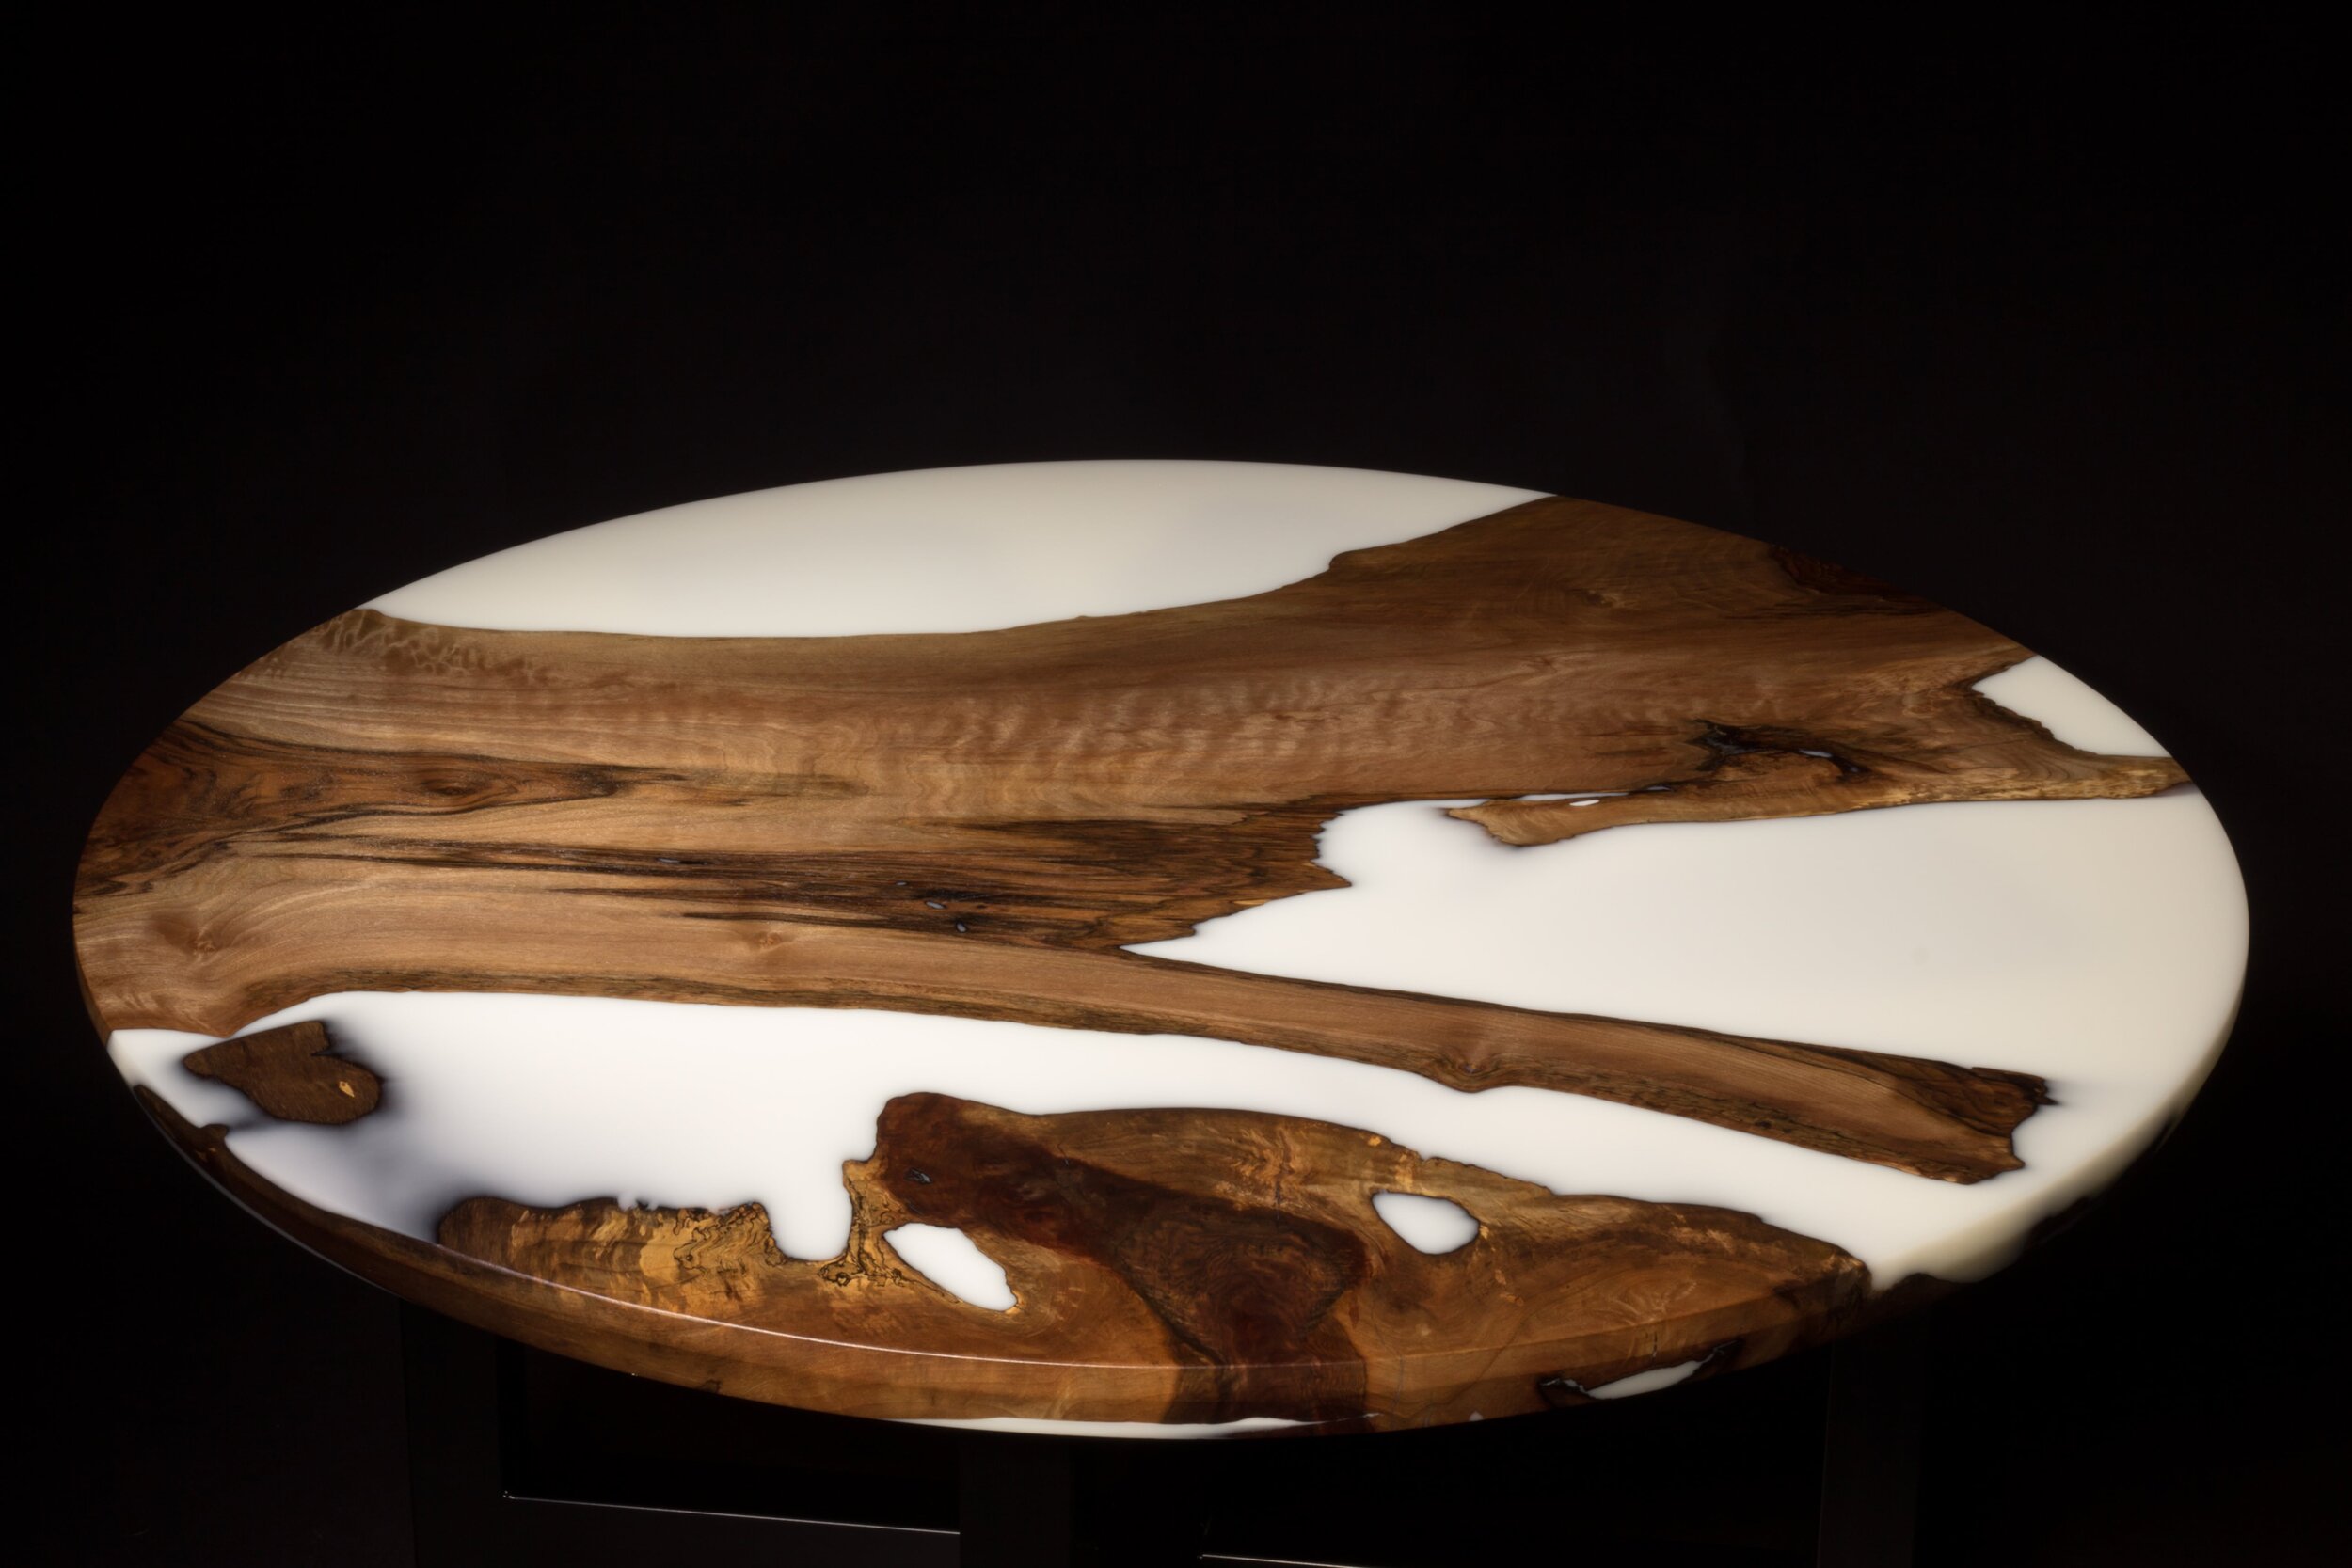
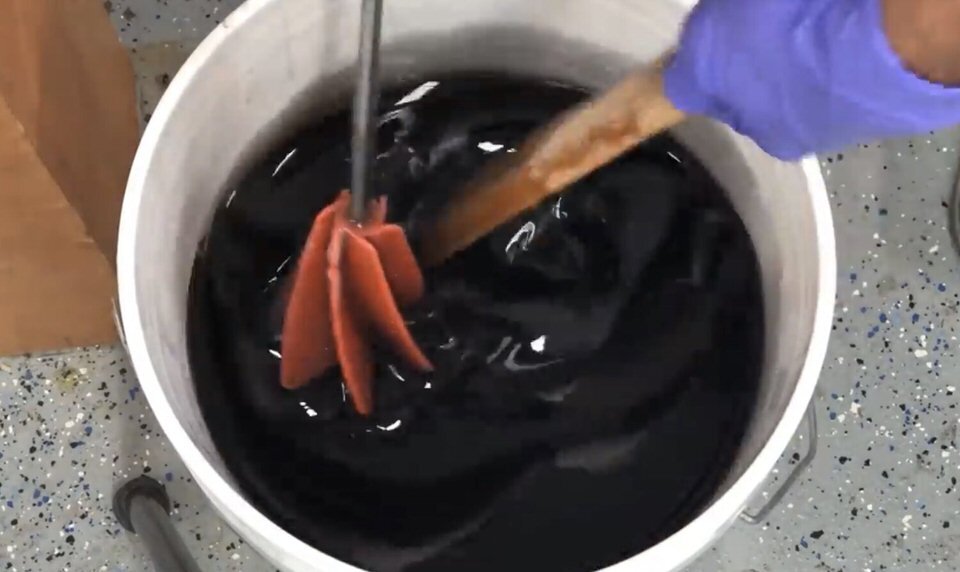
Choosing your dye or pigment
This is totally a matter of taste! I love plain old black. And liquid dyes give me a very nice even black. If you want some fun blues, greens, pinks, or any vibrant color. You may want to go with a powdered pigment. There is no limit to how many colors you can come up with, so have fun with it and come up with something that matches your style. Powdered pigments mix well in water if you want to play around a bit before going all-in with your expensive resin, and if you are looking for a great variety, I would recommend going with the Supercolors Variety Pack.
When you mix your pigment into your epoxy bucket, its a good idea to check your color by dipping in a clear plastic cup and pulling out a sample. Resin looks much different in a deep bucket vs a clear cup. And the cup is much closer to the thickness of your table.
Pouring your epoxy
Everyone loves those instagram videos of guys dumping huge buckets of epoxy into their form, splashing it everywhere in a tidal wave of what looks like purple syrup. Unfortunately, you are also introducing lots of air in the form of bubbles. And while most of the bubbles will pop naturally as it cures. Not all them will pop. So no point in adding them in unnecessarily. Just pour it in nice and slow. It still makes a cool video.

105 liter pour


Bonus tip: let your bucket of epoxy sit for 15 minutes after completely mixing. This will allow most all of the micro bubbles to rise to the surface. After the 15 minutes, just come back and pop the bubbles with a propane torch.
The picture to the left shows how the bubbles will rise if left alone for 10-15 minutes. If you are used to working with traditional epoxy resins and are worried about it beginning to cure during this time, you can relax. You can leave this resin in the bucket for two hours or more with no problem. The picture above shows a quick pass with the torch pops all those bubbles.
Overheating
When epoxy is mixed it creates an exothermic reaction. Which just means it heats up. Every epoxy has a limit to how thick it can be poured due to this reaction. The more epoxy mixed, the hotter it will get. Liquid Glass epoxy can comfortably get to around 130 F. Much hotter than that and it can crack, bubble, and discolor. This happens over about 2” (5cm) deep pours. Where West System epoxy is designed to be a thin coat, and will react around 1/8-1/4”. So make sure you are using the correct epoxy for your thickness. I monitor my pours with an IR temp gun. The epoxy will peak around 12-18 hours, so its a good idea to monitor it during that time. If you are worried about your pour overheating, a simple box fan can help immensely. I can’t stress how much a fan (or two or three) can help save a project. Often I will add them “just in case”.
Wait…
If you are using a liquid dye, you are done for now. Check back in 72 hours and it should be hard, but not fully cured. If you are using powdered pigments and want to get a cool swirl pattern in your finished piece, check back in around 12 hours. The resin will likely still be pretty runny, and much of your pigment has probably settled. Give it a swirl with a plastic knife, hair pick, or even a hair dryer can leave a cool billowy pattern. Check back in another 30-60 minutes or so. If the pigments have settled again, repeat the swirl process. Keep checking back until the resin is about as thick as syrup. You don’t want to swirl thickened epoxy, because you will induce bubbles that wont have a chance to pop. So be a little careful when swirling.
Note: You will need to manually pop any bubbles that show up after stirring with a torch. The epoxy is too far along to pop on their own.
These resins generally take at least 72 hours to become hard. However I will usually wait at least two weeks before removing from the mold. This ensures it has reached near maximum hardness.
Removing epoxy river table from the mold
Take your screws out and give the sides a good smack with a deadblow mallet. They should pop off. Once your sides are off, wood wedges work well in popping the table from the mold. Hopefully you added enough mold release and it comes off easy.
Surfacing your epoxy table
The best way to get your table flat is a good planer. I rent shop time out from a big shop in town that can flatten up to a 50” wide table. I understand everyone isn’t as lucky as me though. There is a good, affordable alternative though. And that is to use a homemade router sled. Check out the great video by Matt Cremona on making a cheap router sled.

Sanding epoxy resin tables
I have a whole video and blog post on sanding and finishing that is pretty thorough. So I'd recommend checking that out for a complete tutorial.
The cliff notes version of that video are this; Fill all imperfections with resin and/or CA glue with an activator. Scrape the touch ups flush with a scraper. Then sand from 100 grit to 320 grit hitting 100, 120, 150, 180, 240, 320. Don’t skip any grits. It’ll show.
Finishing your wood and resin table
I start with one or two coats of Osmo 1101. From there I add 2-3 coats of Osmo 3043 with a really nice auto buffer. You could also use a white pad and your orbital sander if you don't have an auto buffer though. Again, my finishing video will go into a bit more detail than I can go into here. So I think that is worth checking out.
Check out the video below for a thorough explanation of the sanding and finish process. However, I discovered the Osmo 1101 after making this video. I use it on all my tables now.
Attaching the table legs

Threaded inserts going in
Threaded inserts have been a total game changer for me. They give a real professional touch to your tables. And make it possible to assemble and disassemble your table an infinite number of times. Long gone are the old days of driving in lag bolts.
The installation is easy. Just drill a hole the size the manufacturer recommends. Make sure not to go too deep though! The drill bits with stop-collars are great for making sure you get the proper depth (I’ve seen people drill through their table tops). Once you have your holes, just screw in your inserts with an allen key. I like to add some epoxy or CA glue to the inserts to ensure they never back out. Go slow, if you get resistance, back it out a quarter turn, then keep going.
Photograph, share, and enjoy your table!
No point in working this hard if you don’t get to show it off! I made a video on how average joes can get awesome photos. All you need is a DSLR, a flashlight, and some patience. Check it out, and good luck with your project!