Liquid Brass in Wood - Real Brass Epoxy Table - Cold Casting in Wood
MATERIALS:
Amazing statue available in cold cast bronze by Ed Elliott
Basically, its just fine brass powder mixed in with epoxy. Pretty simple to say, harder to make look good. This real metal epoxy is nothing new. It is primarily designed for cold casting. Which is a cheaper alternative to casting real bronze statues. Basically, artists use these metal powders mixed with resin, then use them in their mold. Creating a realistic casting of a statue that looks just like foundry bronze, for a lot cheaper. It isn’t just limited to bronze or brass. You can get copper, aluminum, zinc, and other metals. Just depends on the look you want.
Using With Wood
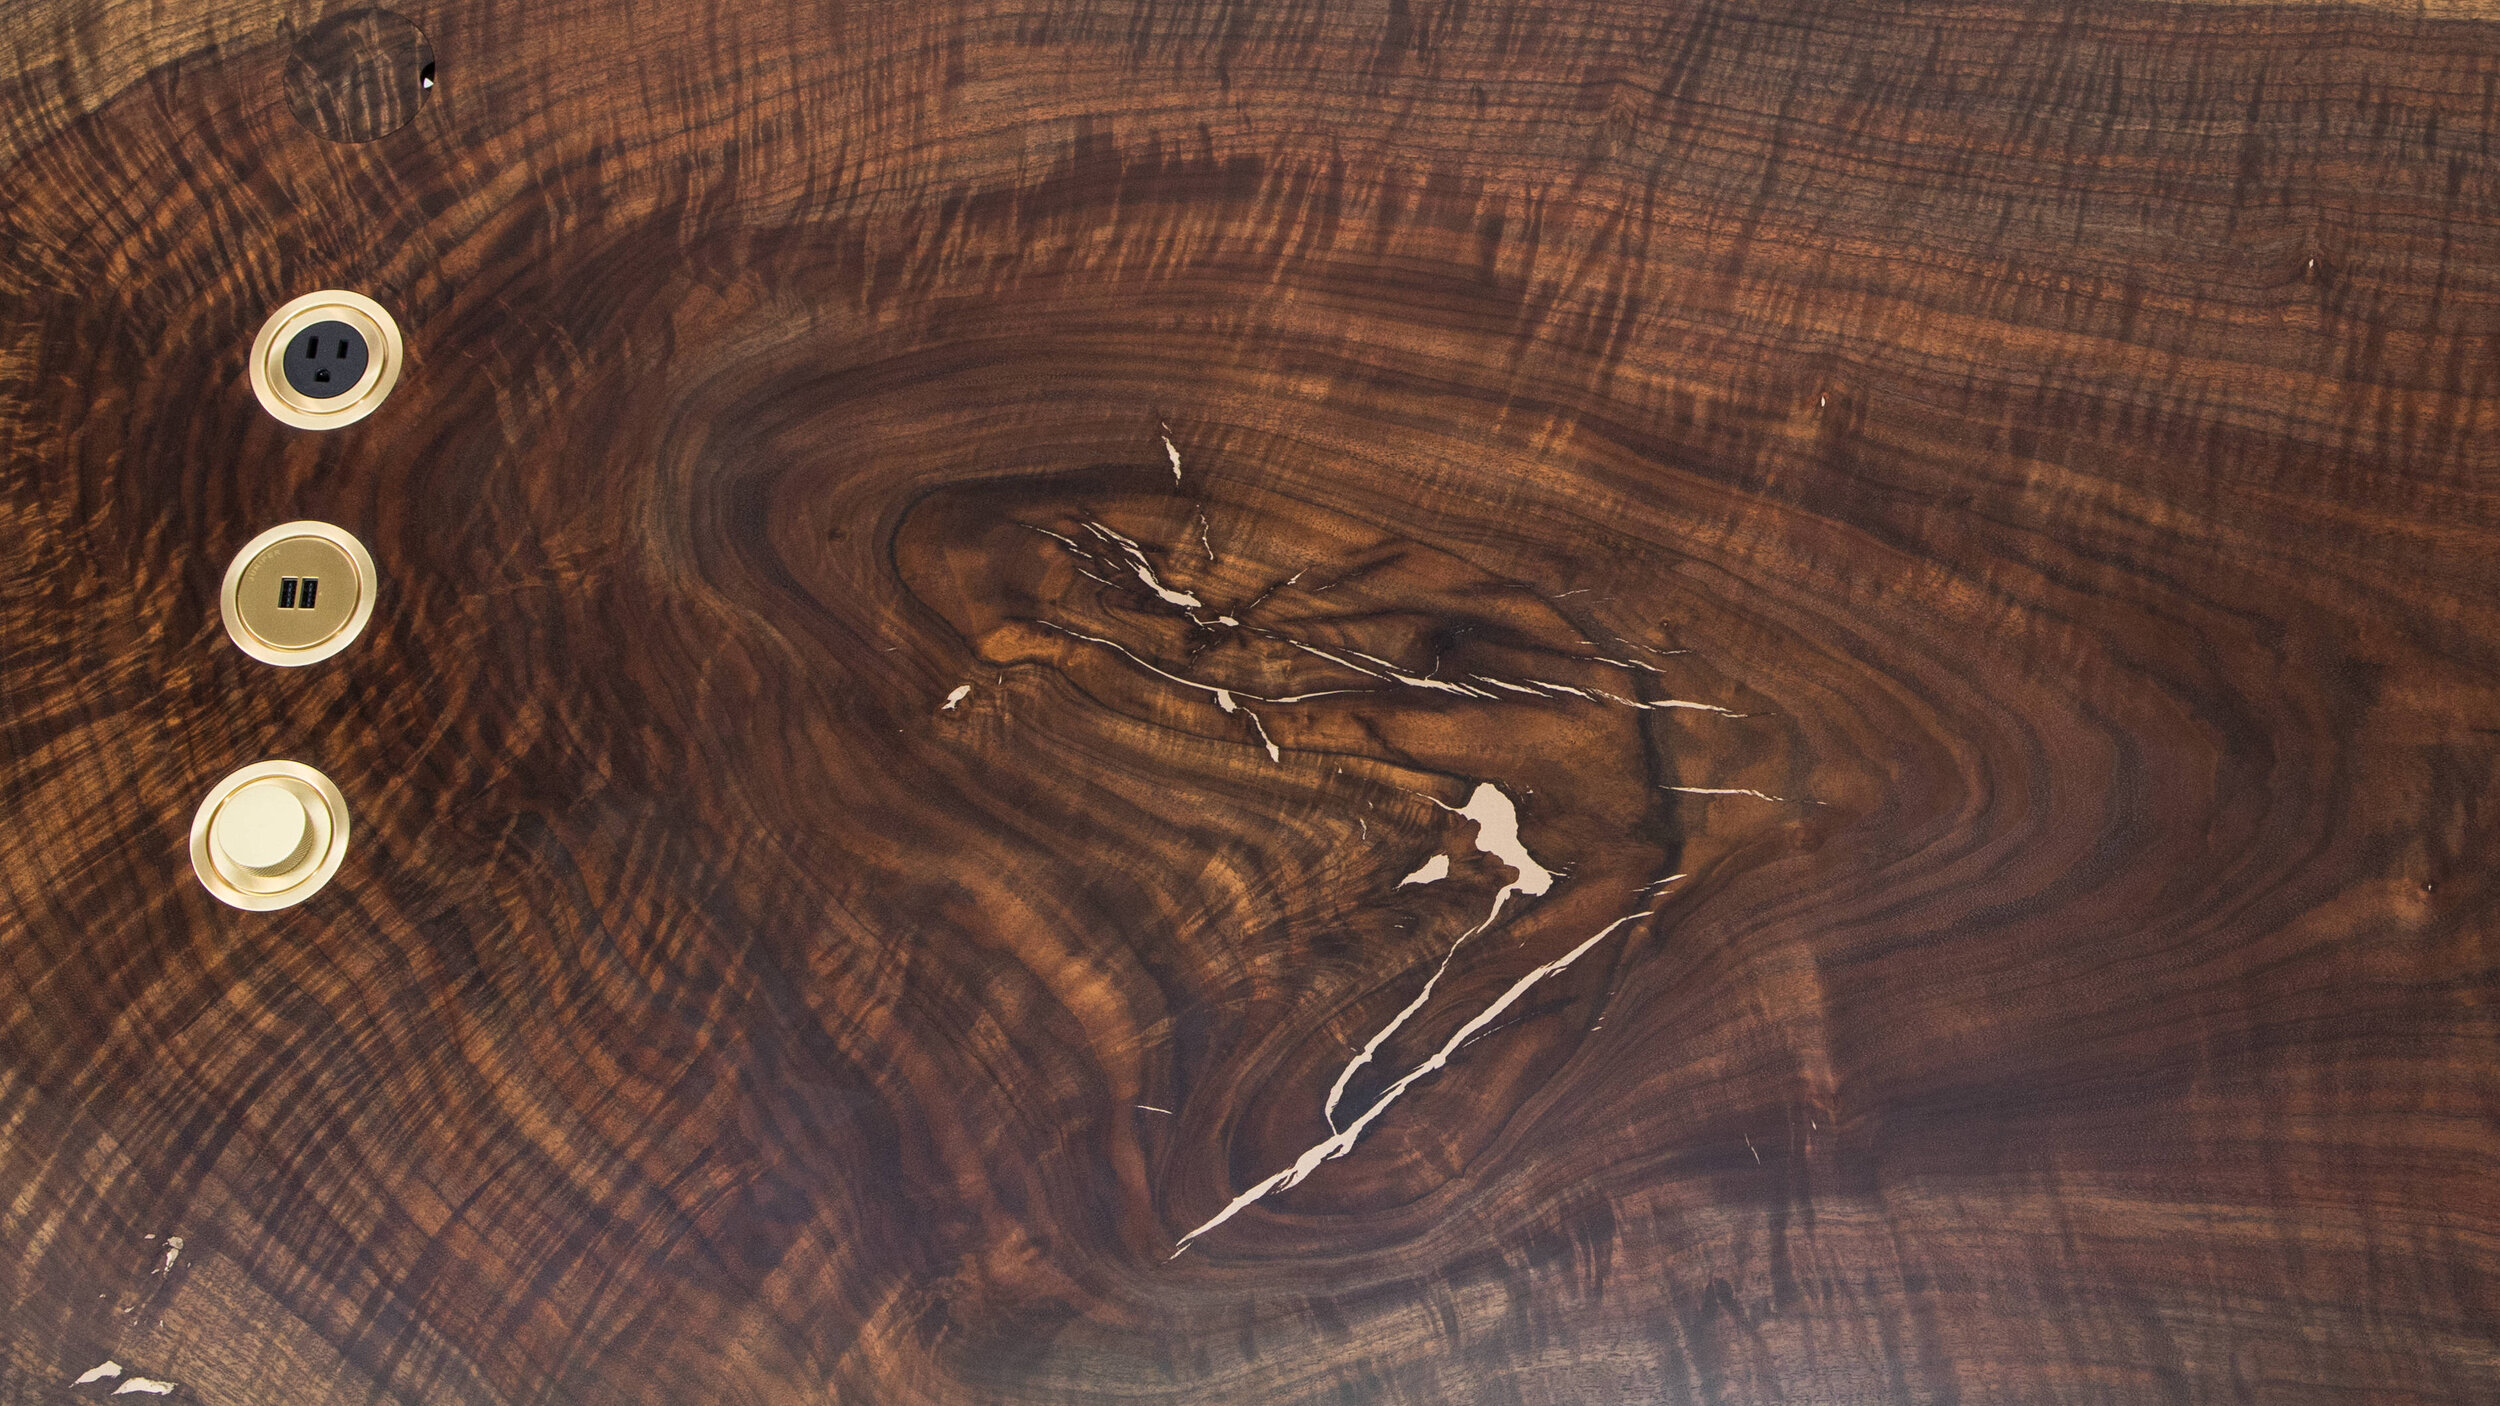
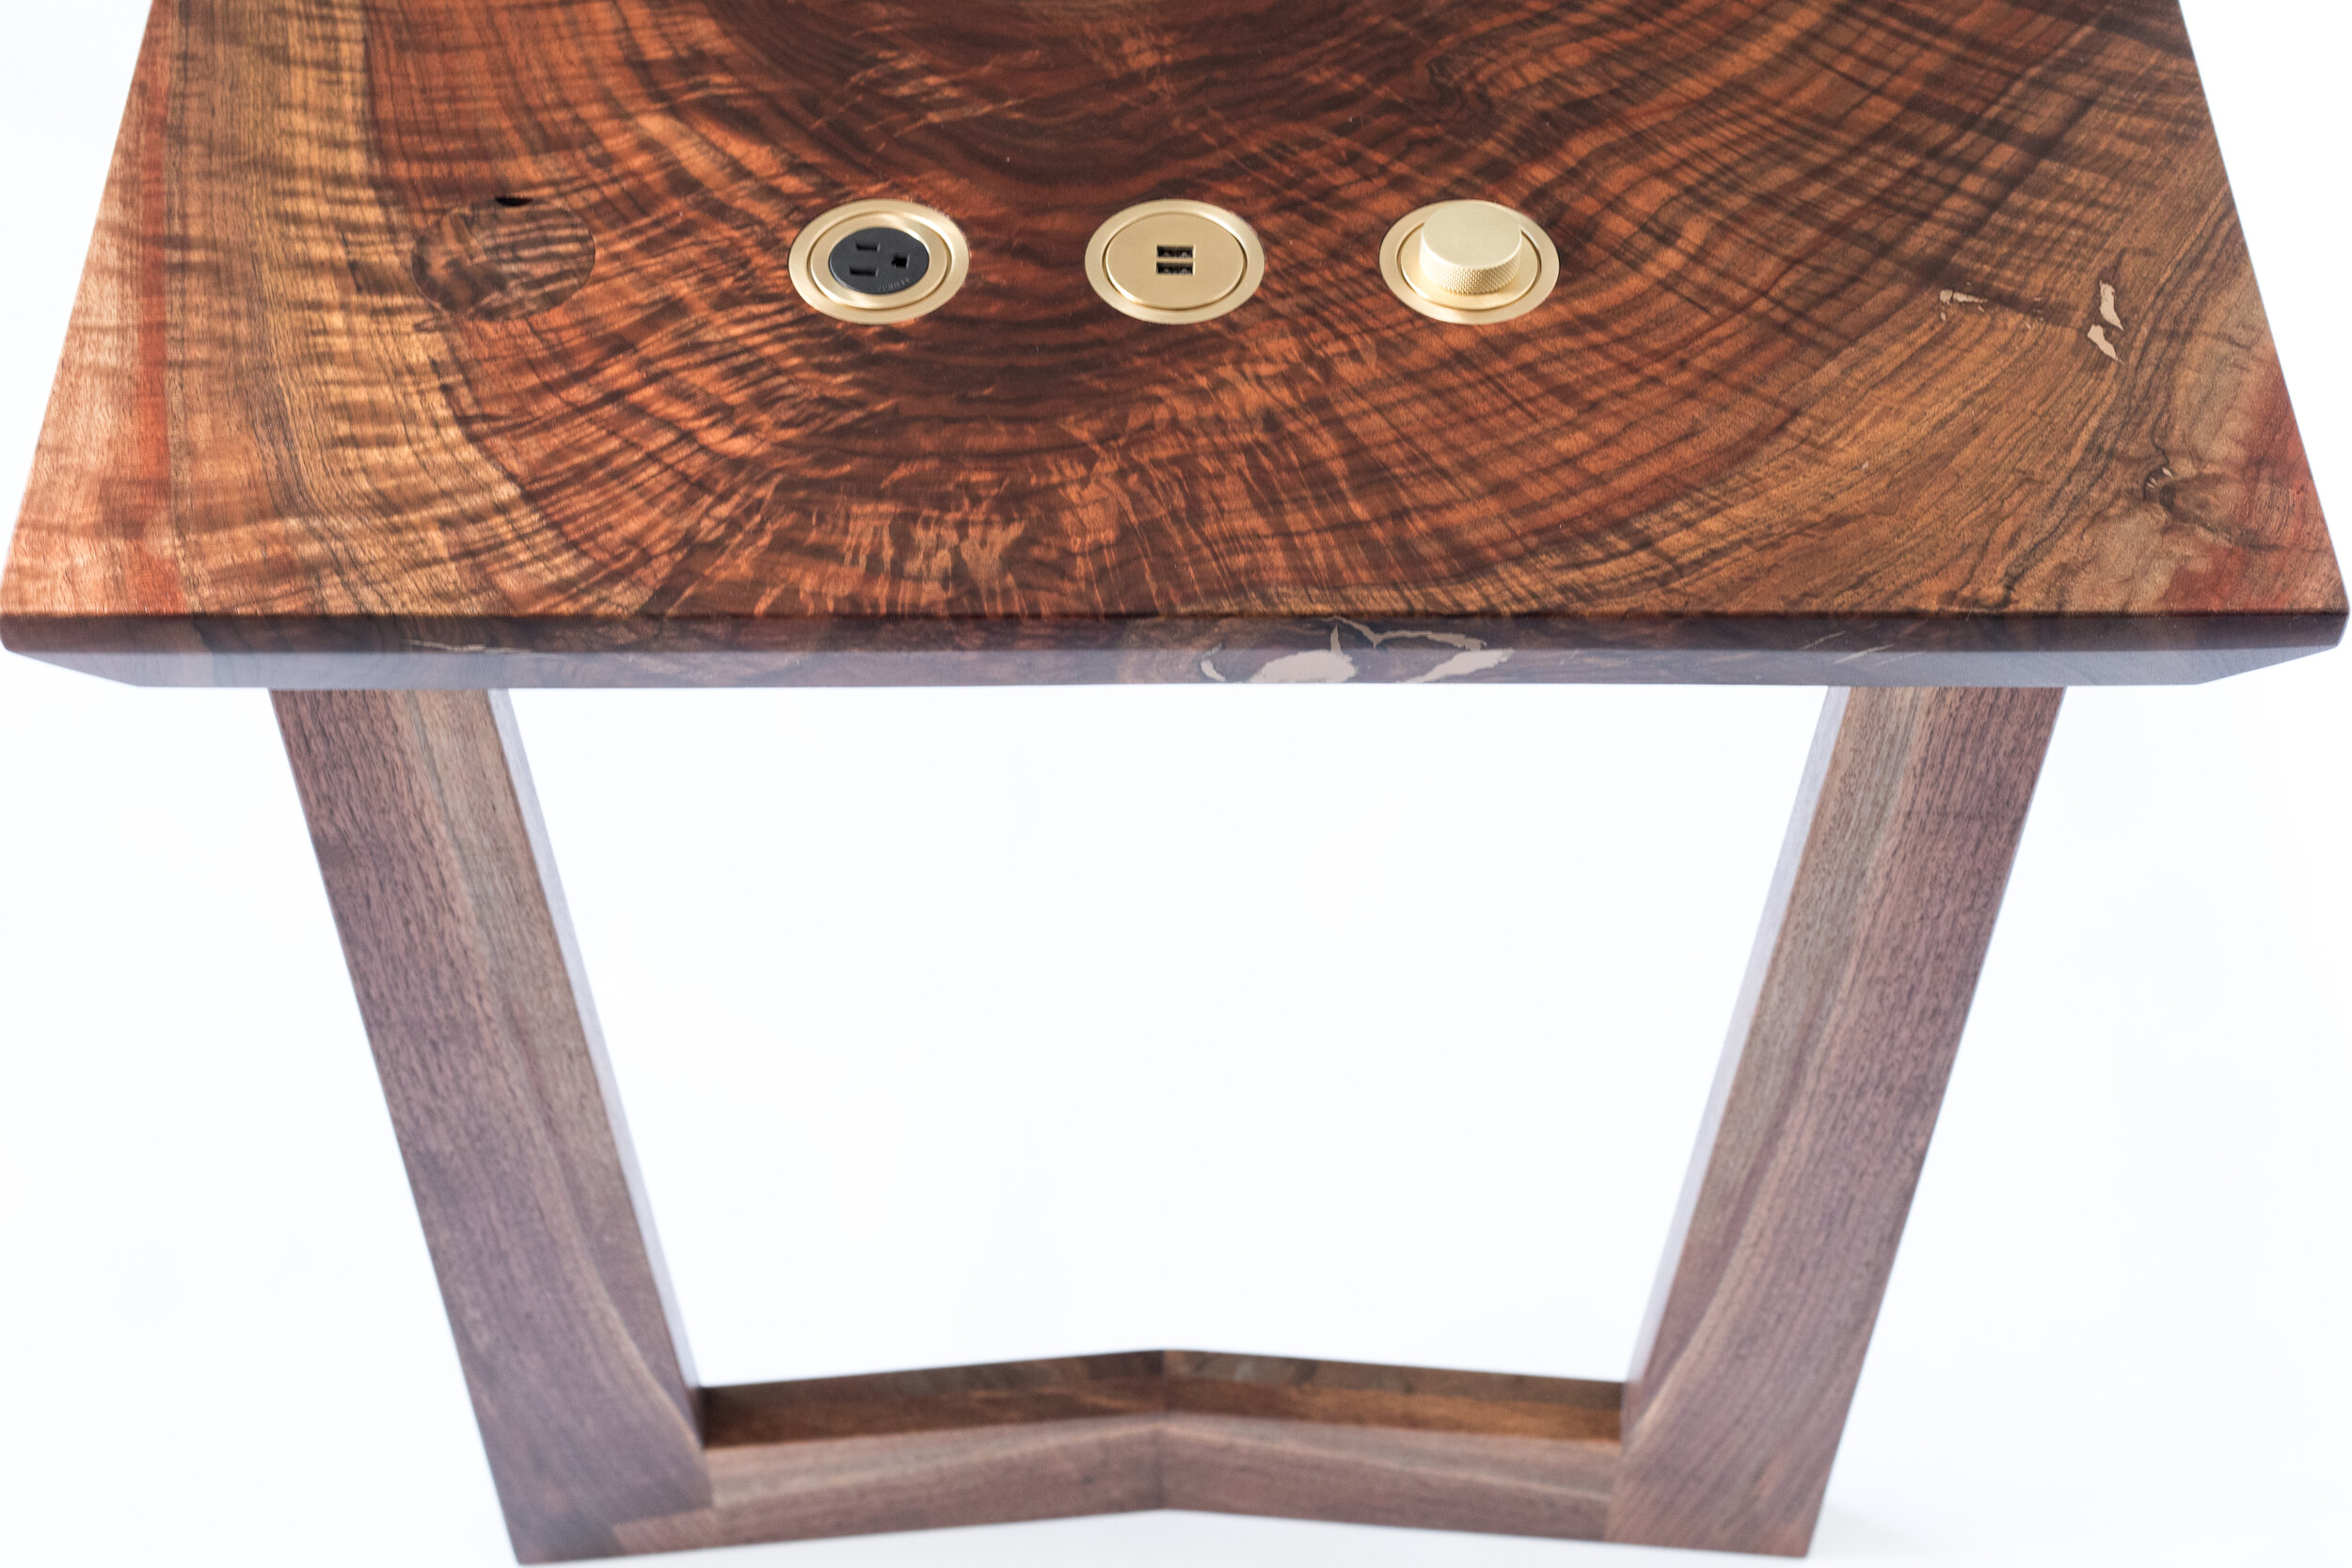
Brass cracks in a desk I made for my wife
Like a lot of unique projects, you need to be careful how much credit you give yourself. I had never seen this cold casting powders used with wood. But in no way does that mean I am pioneering it. Just that I haven’t seen it before, and all the techniques you’ll see me use I learned through my own trial and error.
The Epoxy
Some aspects of this process are very similar to traditional epoxy processes. Some are opposite. So read on to learn from my trials and errors.
I found I had some problems with tiny bubbles that left little pits in the brass when I used a traditional epoxy like West System. Even if I degassed it in a vacuum chamber. So I found I really needed to use a slow cure resin that cures rock hard. Lately, I’m using Liquid Glass resin.
To start, I mix my resin and hardener very thoroughly. Just as I would any epoxy. Then I warm the mixed epoxy by setting it in a warm water bath. I try and warm it to around 100F. This makes it nice and thin. If you want to go a step further, you can degas the epoxy in a vacuum chamber too. Not entirely necessary though if you use this epoxy.
Mixing the Powder with Resin
If you are familiar with using powdered pigments and epoxy, go ahead and forget everything you know. If you aren’t familiar, you’re a step ahead. Oh, wear a mask before you do anything. Metal powders can have some weird/bad effects on the body.
The main difference is how much powder you have to use vs pigment. I’d say you need to use at least 50% metal powder to epoxy. Where normal pigments are closer to 2%. Slowly mix in a little powder at a time. Don’t just dump in all in. This can cause clumping and give poor results. A sifter would be ideal, but I haven’t used one.
Pour Upside Down
Whether you are pouring a full river or just filling some cracks, you’ll need to plan your pour upside down. This is because the metal powder is so much heavier than traditional pigment. It sinks almost immediately after mixing. We compensate for this by letting gravity do the work. I had some small cracks, so I filled them as much as I could. Then covered the cracks with tyvek tape, flipped the table over, and let cure for three days. Don’t use painters tape, it will leak like a colander. This worked really well, but use caution if you are going to use tape. The epoxy can still leak out, so it might make a mess. Not nearly as bad as painters tape though. The good thing is the brass powder isn’t as likely to leak. So you won’t lose the important stuff. A sheet of painters plastic will save any mess if you do have some drips.
after the cure
Belt sander makes quick work of the excess.
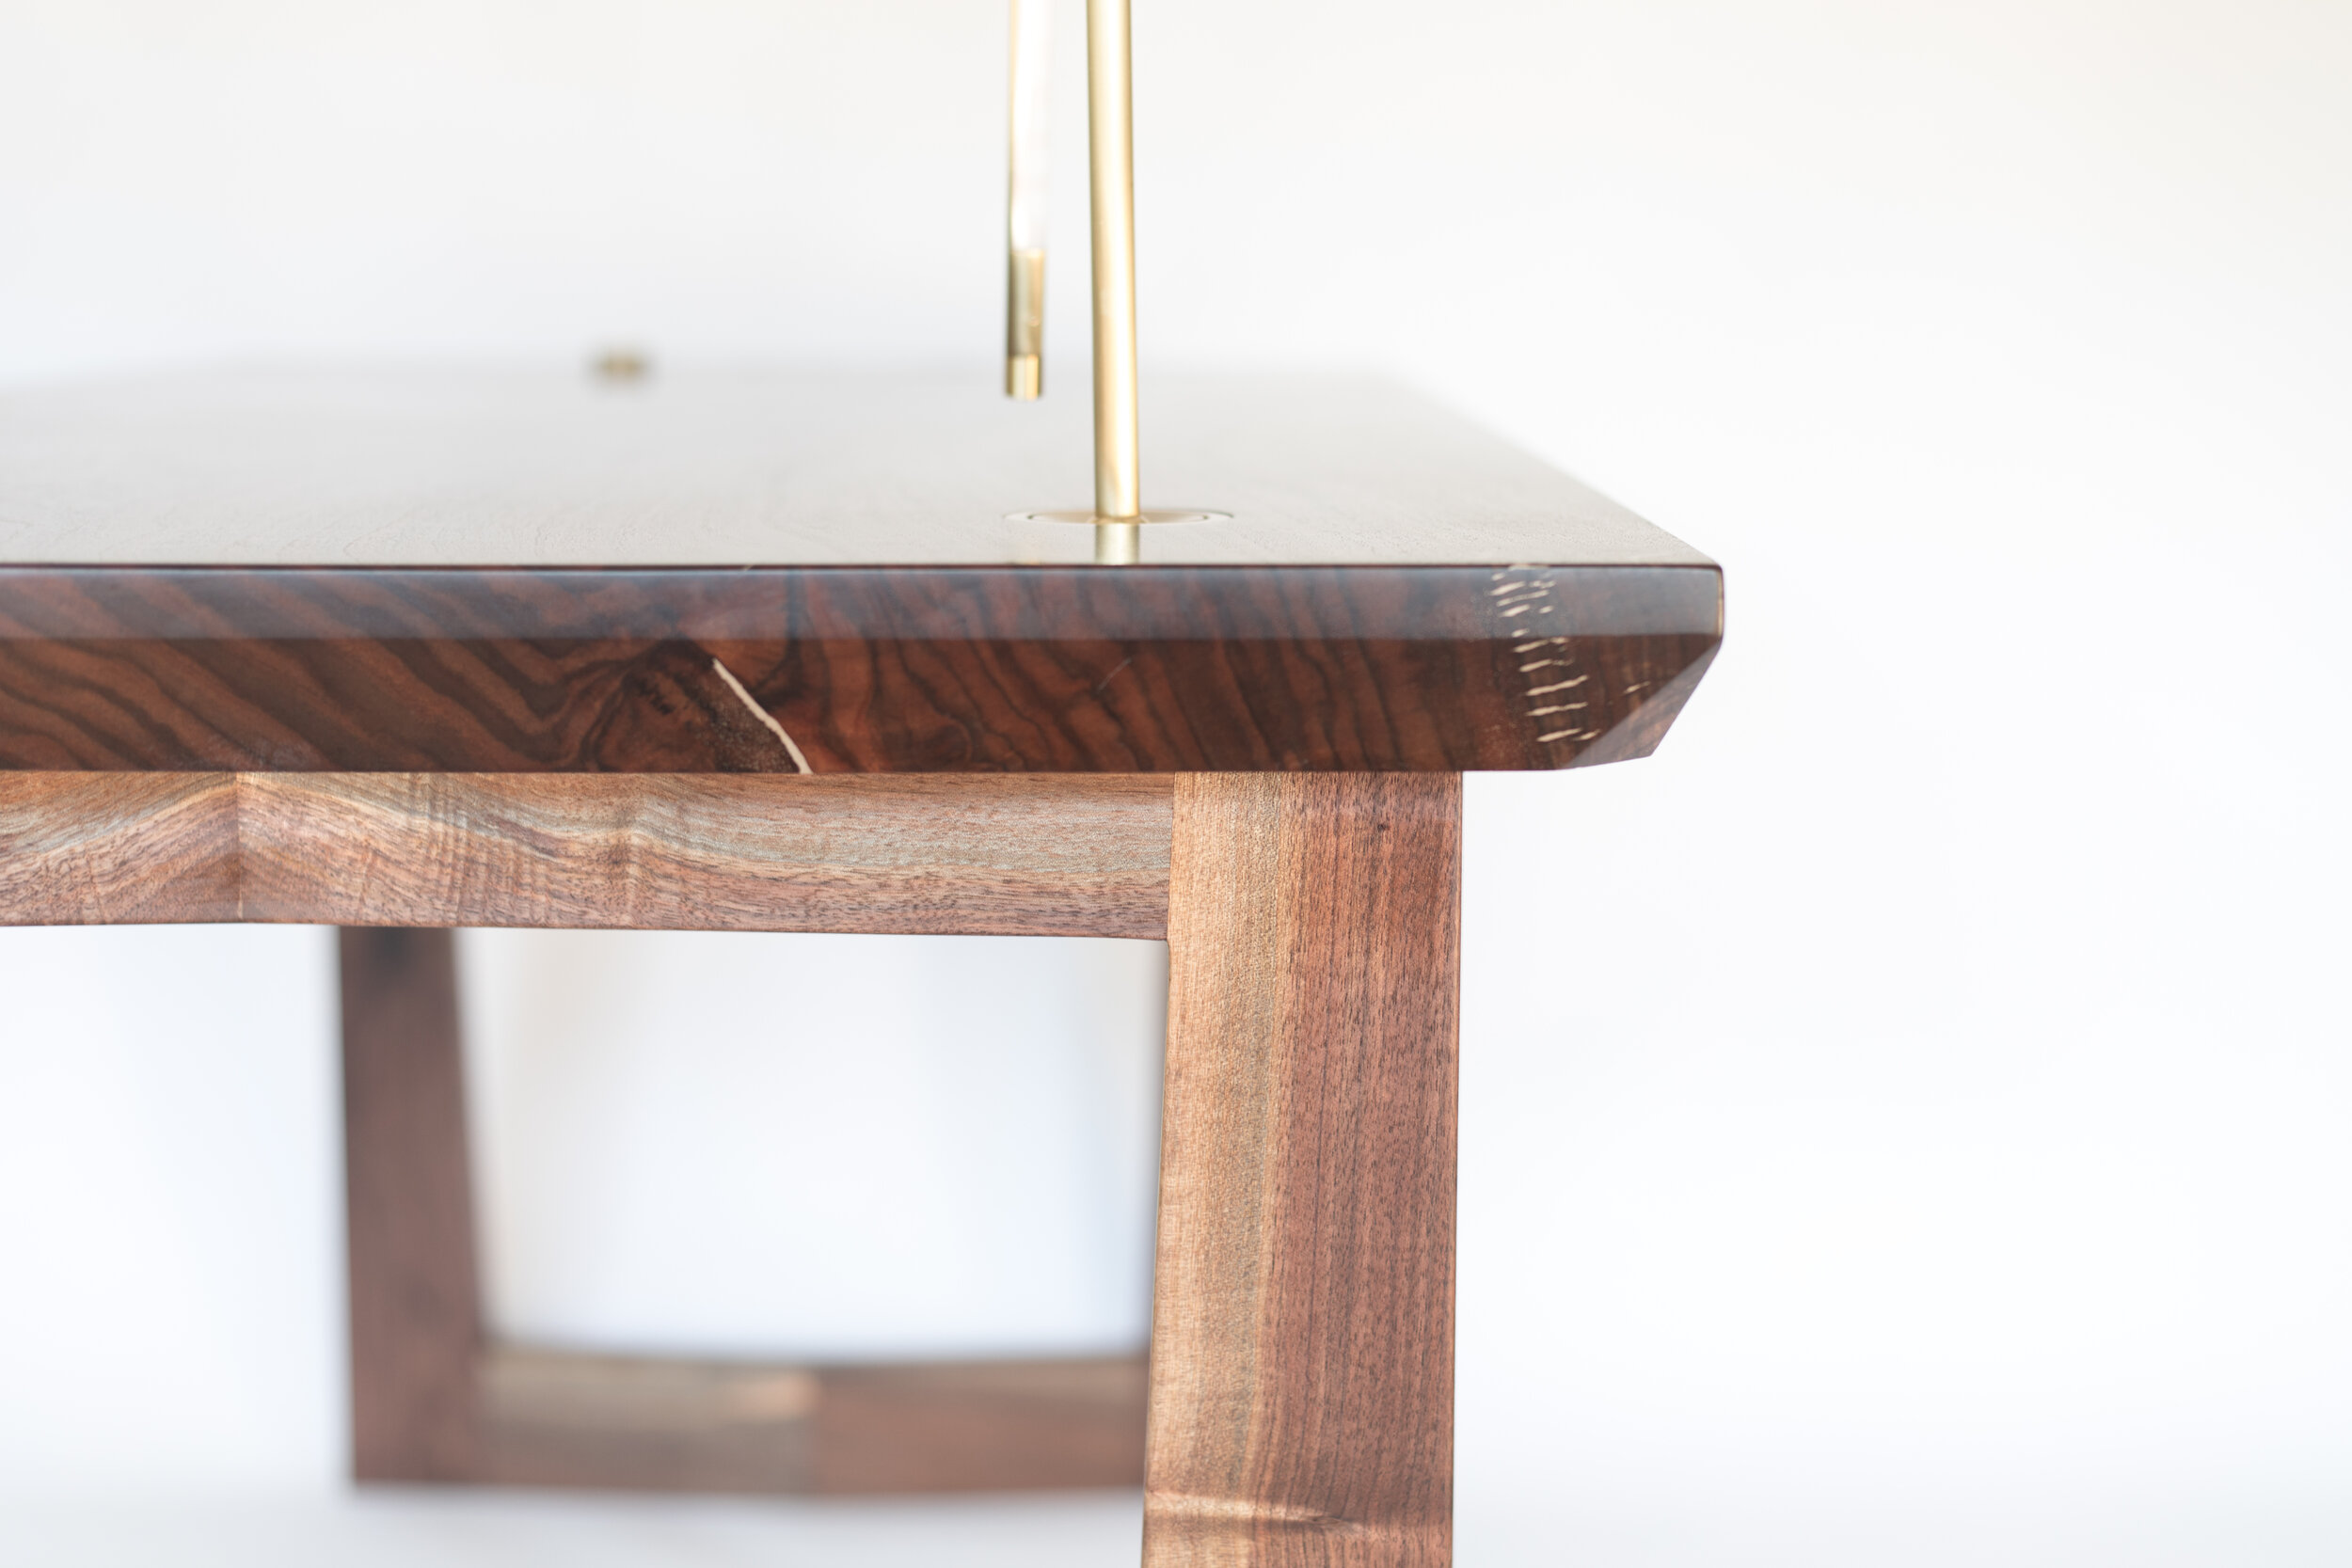
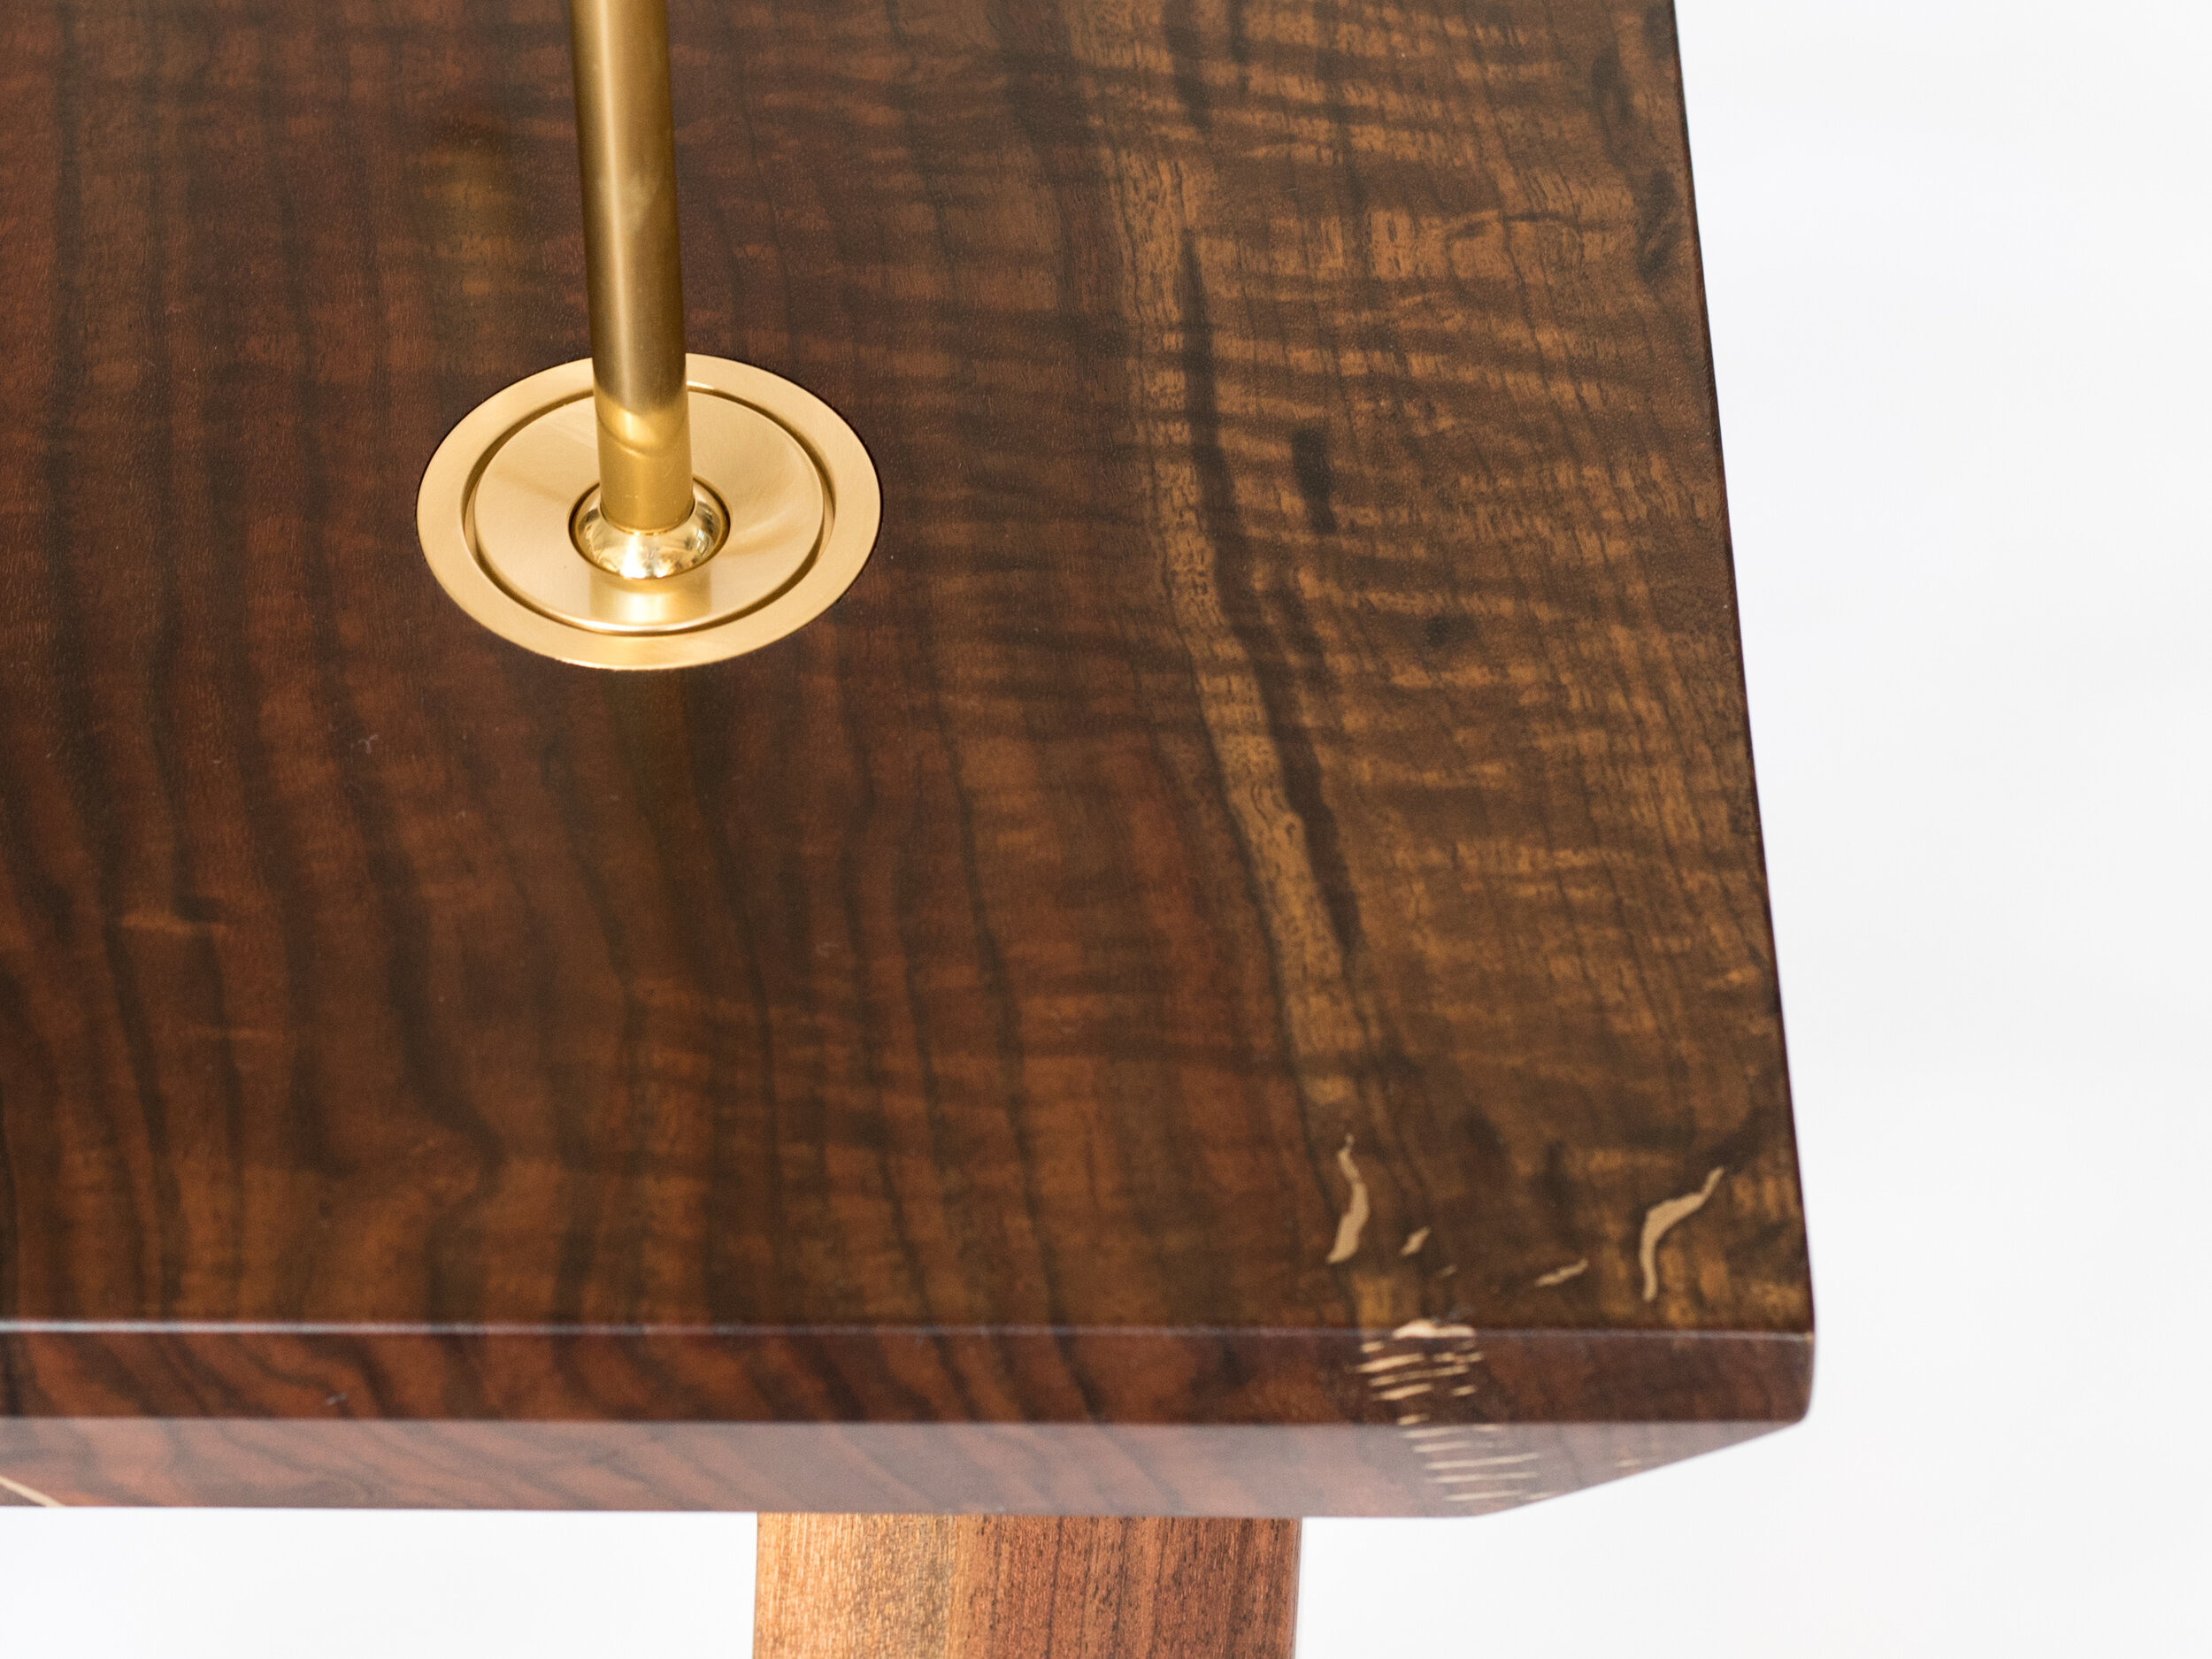
Once you are confident you epoxy has fully cured, go ahead and flip the table back over and peel the tape off. A good tip is to use a heat gun or hairdryer to warm the tyvek tape to make removal easier. Don’t be too discouraged if the metal epoxy doesn’t look great so far. It’ll get better. The metal epoxy will sand and plane nearly like wood. Just a little harder than most wood. I usually get started with a belt sander to remove the bulk of it. Once it is pretty flat, I’ll switch to my orbital sander. Around this time I’ll generally see some little gaps and voids that didn’t get totally filled. Don’t worry though, we can fix it. And it wont take three days.
Filling pits
You can also pre mix CA glue and powder. Then brush it in.
No matter how well you did with your pour you can still get some little pits and gaps. Instead of repeating the lengthy pour process again, I have an easier solution. We are going to use thin CA glue. All you do is fill your pit completely with powder, then drop in a little thin CA glue. It has great penetration and looks just like the epoxy after sanding. It hardens in about 10 seconds, so you can sprinkle in a little extra powder if you need to. But act fast. Wait 30 seconds, sand down with your orbital, repeat until you’re satisfied. Another effective method is to mix some medium CA glue directly in a small pile of powder. Then use a small brush to mix the slurry directly into your pit.
Prep for finish
Sand your entire piece just as you would a normal piece of wood. If you are satisfied with how the metal resin looks after sanding, you are all good. If you’d like a little more “machined” finish, you can softly sand in some lines to really make the metal pop. I found the best way is to use a 600 grit sanding sponge or 0000 steel wool. Just don’t press too hard or you will scratch your wood and leave an ugly sanding pattern.
Finish
I’ve had the best success with hardwax finishes like Osmo or Odie’s Oil. They aren’t a film forming finish that will fill those fine machine lines. They are a wipe-on, wipe off finish. So you get an amazing look and protection without the plastic feel of a poly or varnish. If you’d like more info on hardwax finishes, check out my how-to video on the topic.
and that’s it!
I am still learning and experiments with this real metal epoxy. So far I have only used brass and bronze powders. However I can’t wait to try them all. I think this could open up a whole new realm to the somewhat overdone epoxy table movement. I’d love to hear some ideas from you in the comments on what project you’d like to see done with this relatively new medium.