A TABLE AS COOL AS A GUITAR
I always admired the amazing colors and chatoyancy on the high end electric guitars. PRS is probably the most famous when it comes to truly breathtaking colors in addition to being one of the top luthiers in the world. I have wondered for a while what it would take to implement a similar stain/dye on a table to be used in the home, and why more people arent doing it already. So I decided to figure it out.
What wood should you use?
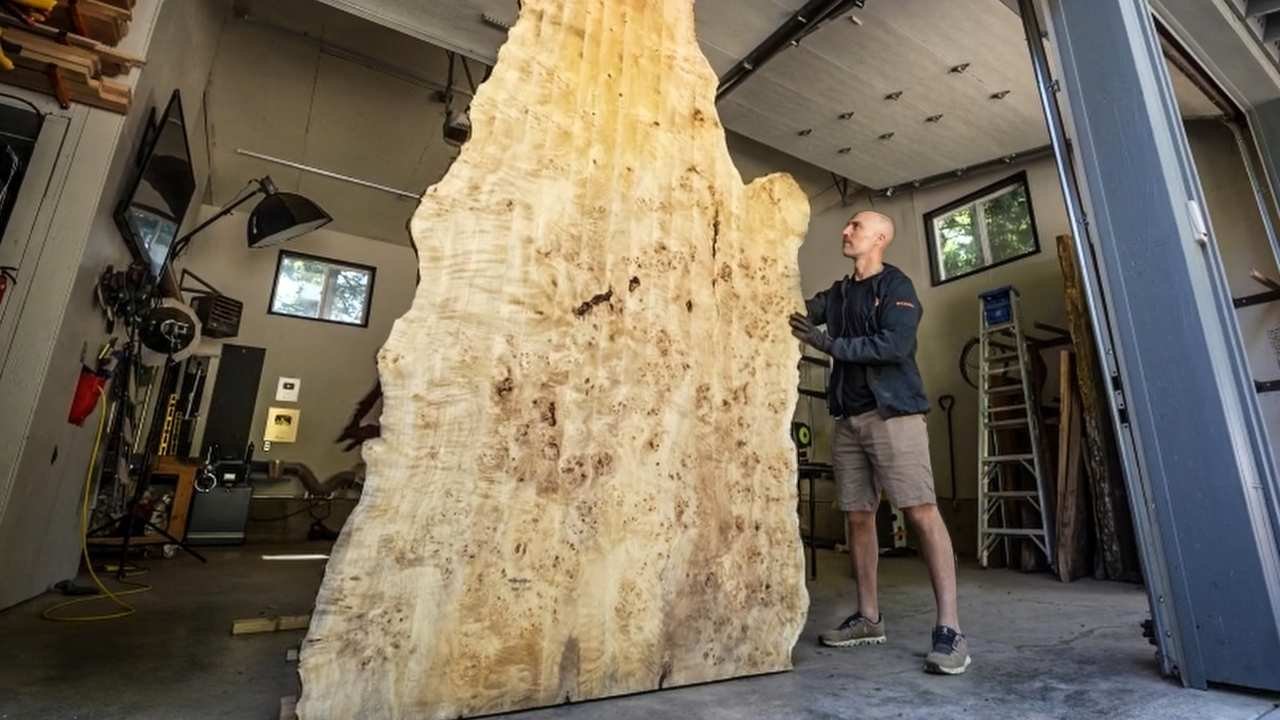
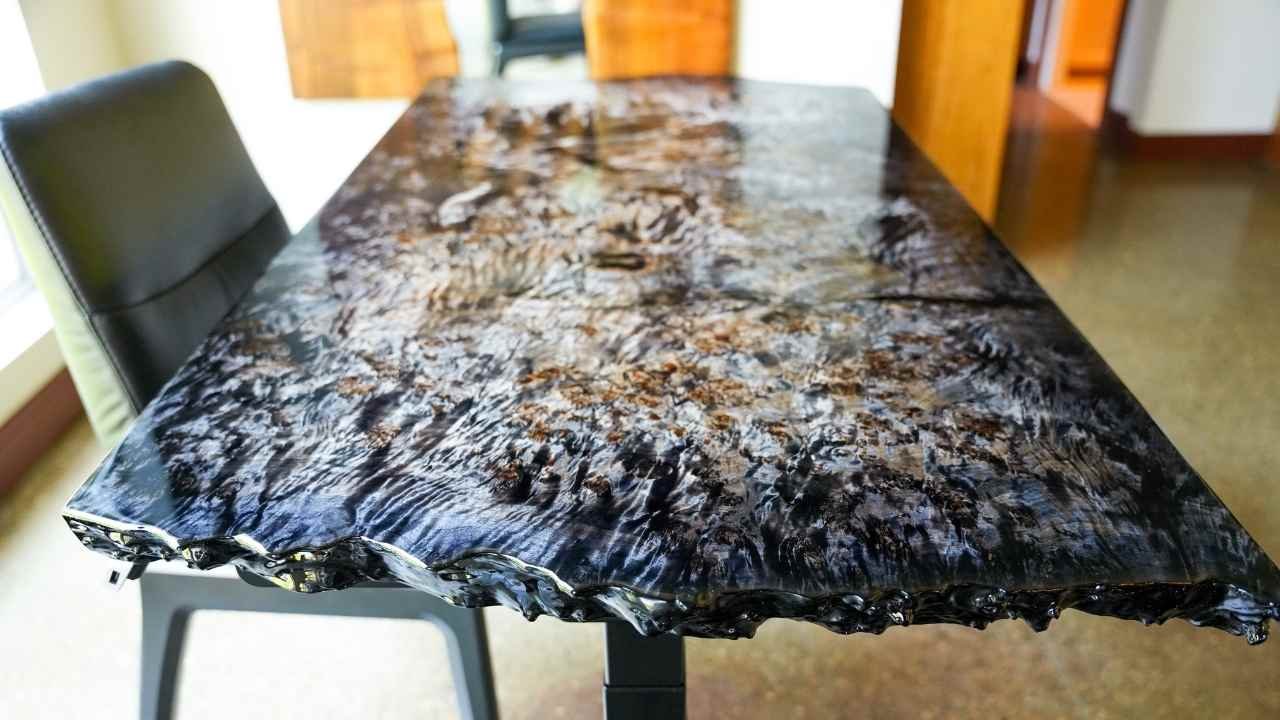
This giant slab of Mappa burl became two desks.
This is obviously a loaded question, but a fair one. Generally speaking you want a lighter wood to start with. Getting a piece with a lot of figure (Burl, curl, quilt, etc) is a real bonus here. Figured maple is the standard for high-end guitars. However, I am will be showing you examples using Mappa burl (Populus nigra). Note: Figured maple, is not a type of maple tree. Just like quilted maple, tiger maple, flame maple, curly maple are also not types of a maple tree. They are specific types of wood figuring found in many wood species, not just maple. However, most figured maple pieces you see come from Bigleaf Maple. The Mappa burl I am using contains lots of burl and curl-type figuring, but you can get a single slab of wood with many different types of figure in one piece.
Just buy some Stain?
The term stain gets thrown around a lot in the woodworking world. From deck and fence stain, to floor stain, to furniture stain. So can you just go find the same stain that PRS uses and be to go? Unfortunately, it isn’t that simple. Luthiers use dyes as opposed to stains. Often the terms are used interchangeably, but there are distinct differences between dyes and stains. I am no chemist, but I do know how to google things. So I found an excellent summary of the difference between stain and dye by Gerry Phelan on woodcraft.com:
“Stains are made of colored pigments that stick in the grain and pores of the wood surface while dyes consist of microscopic particles that penetrate the wood itself. As a result, dyes and stains produce different effects and affect different wood species in different ways.”
He goes on to explain that you can compare stain to very thin paints. Where dye penetrates the wood itself. Most over-the-counter stains like Minwax are actually a combination of stains and dyes. There is an extensive laundry list of advantages and disadvantages of stains vs dyes if you want to go down that internet rabbit hole, but for the sake of this article, just know we will be using a custom made dye, not stain.
Ok, dye. Now what?
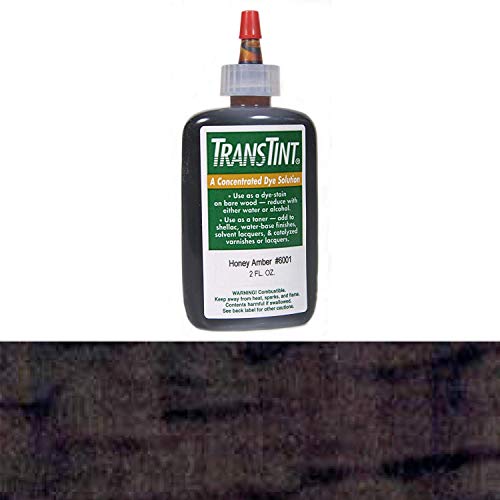
There are a number of dyes available for purchase. Some are sold as a concentrate, designed to be custom mixed to your liking. Where others are sold pre-mixed, and are ready to use out of the bottle. Don’t be intimidated by concentrates, mixing is extremely easy, cost effective, and entirely customizable. I purchase Transtint dye either online or at a local woodworking supply store. The small bottle is extraordinarily concentrated and the colors are beautiful. For this table we are using black though. Although, I’d love to look into doing more wild colors in the future.
What do we mix our dye with?
When I first attempted this, I read many articles on the best liquid to make our custom dye with. Most articles told me to use denatured alcohol with my dye. The main benefits are that it dries quickly and won’t raise the wood grain like water. I tried this method on a few pieces but found it extremely hard to get an even color across the piece. The alcohol would dry before I could coat a section, leading to a very uneven appearance. After enough coats and some sanding, I was able to get a nice color with alcohol, but it wasn’t easy.
Before my recent attempts, I reached out to a luthier I follow on Instagram, Koca Guitars. He makes some incredible guitars, many in the “PRS” style I am fond of. He told me that he has tried every possible way to dye and has found plain tap water to be the most effective solution to use with these dyes. I was initially skeptical, but I can definitively say that I am now sold on the water-dye combo.
Creating your color
I start with a spare mason jar or just any old clean container with a lid. I add my water first; then, I squirt in some dye. You probably want to know the exact ml I use, but I don’t keep track. I just add some dye to the water, stir it, then test the color on a small piece of wood scrap. A plain cloth from an old t-shirt works great to apply the dye. Keep adding dye to your jar until you are satisfied with the color. Don’t be too paranoid about getting this part perfect. As Koca told me, you can always sand it off or add more dye.
Sanding your top
Before applying the dye, you need your piece to be properly sanded. Many new woodworkers want to sand too high. They think smoother=better so that they might sand it to 400 or even higher. Koca told me that he generally sands his guitars to 180, maybe 240. No higher. Going any higher and you start to close the wood grains off to the point that the dye will have a hard time penetrating the wood. So I generally sand to 180 (100, 120, 150, 180) with an orbital sander before the first coat of dye. Before my last sanding pass with 180 (after 150) I will “water pop” the piece. This is done by spritzing water across the top, letting it dry, then sanding with 180. This will prevent most grain raising when you apply the first coat of water-based dye.
Applying the dye

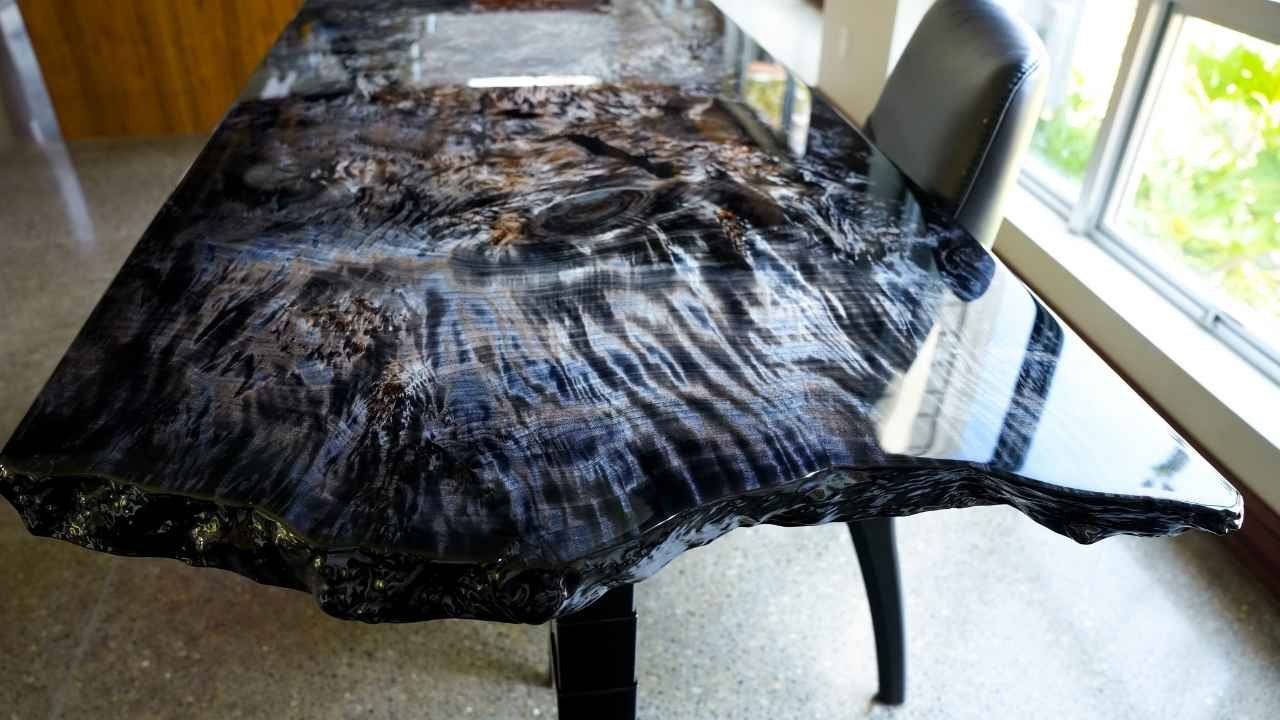
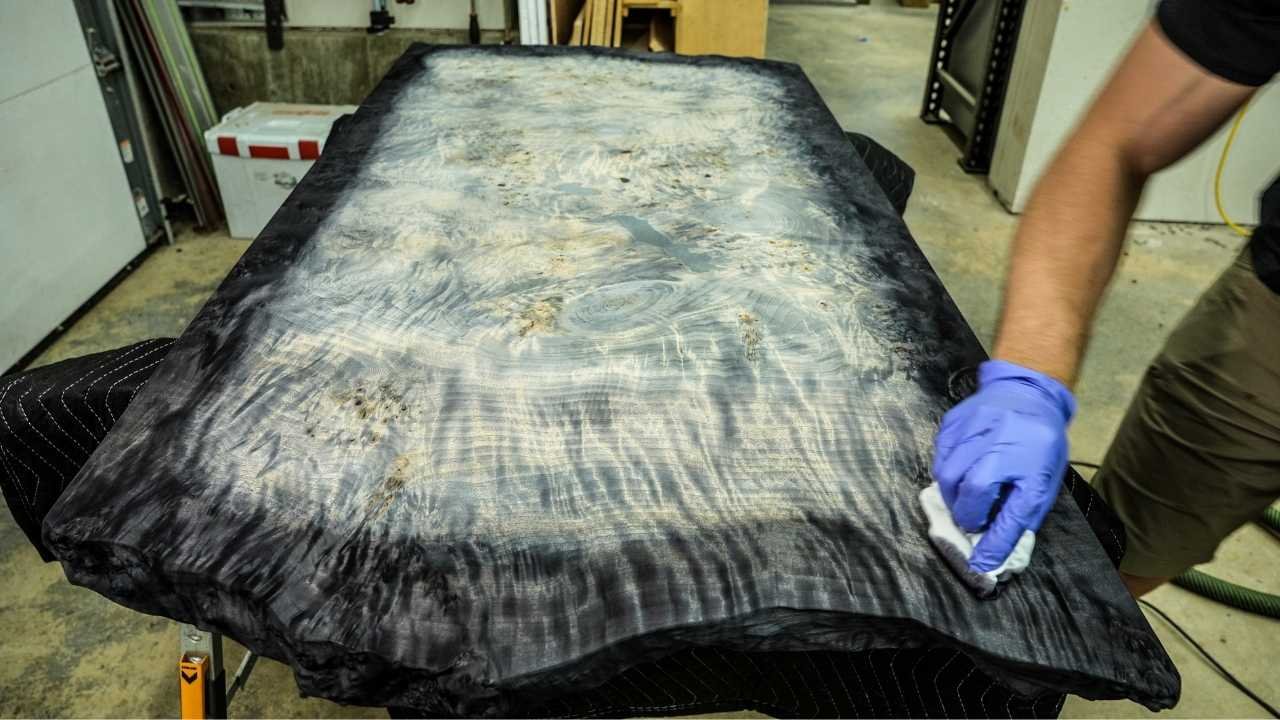
One of the two black mappa burl tables I have done this year
I take a piece of old T-shirt and get it pretty saturated with dye but not dripping wet. I then just work it over the entire piece. When it dries out, I dip it back in the dye and continue across my entire piece. I then let it air dry for 30-60 minutes or longer.
If you find the grain is still raised at this point, you can sand the entire top lightly to knock that down with 180 or 240 grit. You will remove some of the color by sanding it back, but that can be fixed on the next application of dye.
At this point, you are in a perfect spot to make the piece your own. You can add another coat of the same color to even everything out to a nice consistent shade, or if you want to add some effects, read on.
Customizing your piece
Many of the guitars I love are not one solid color, but a fade, burst, or combination of colors. This can be done just by some sanding and/or additional coats of dye.
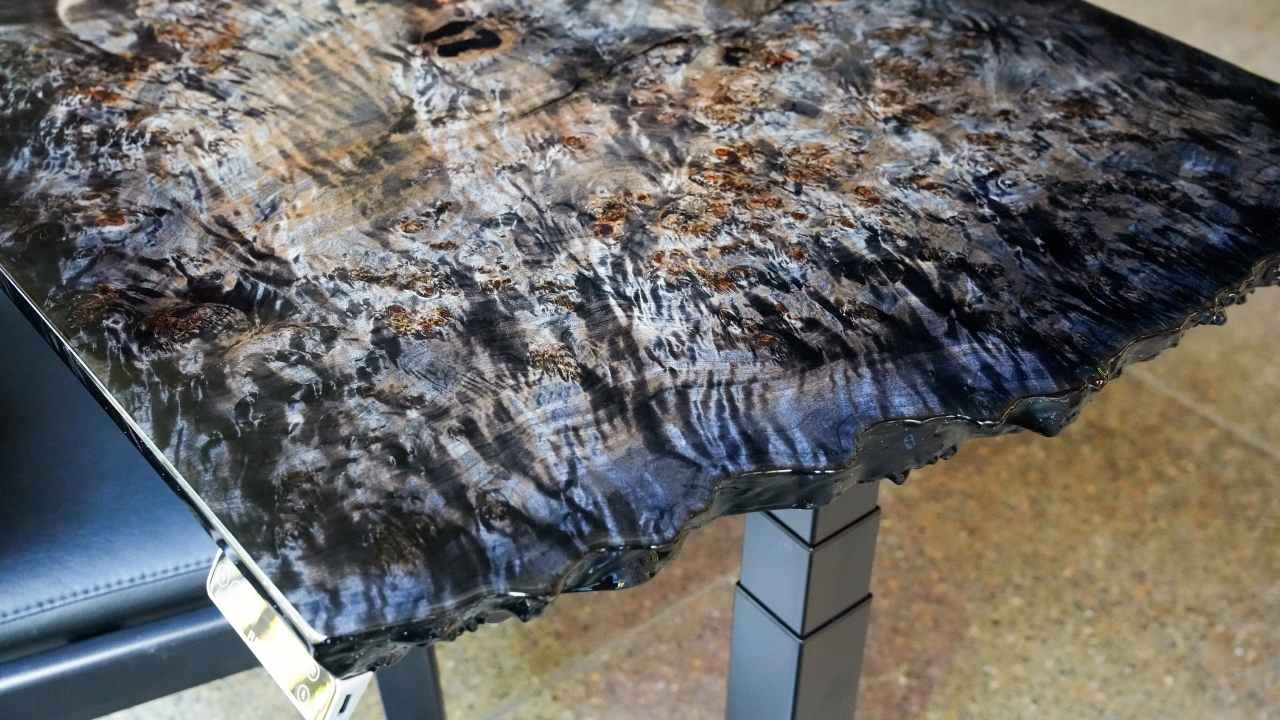
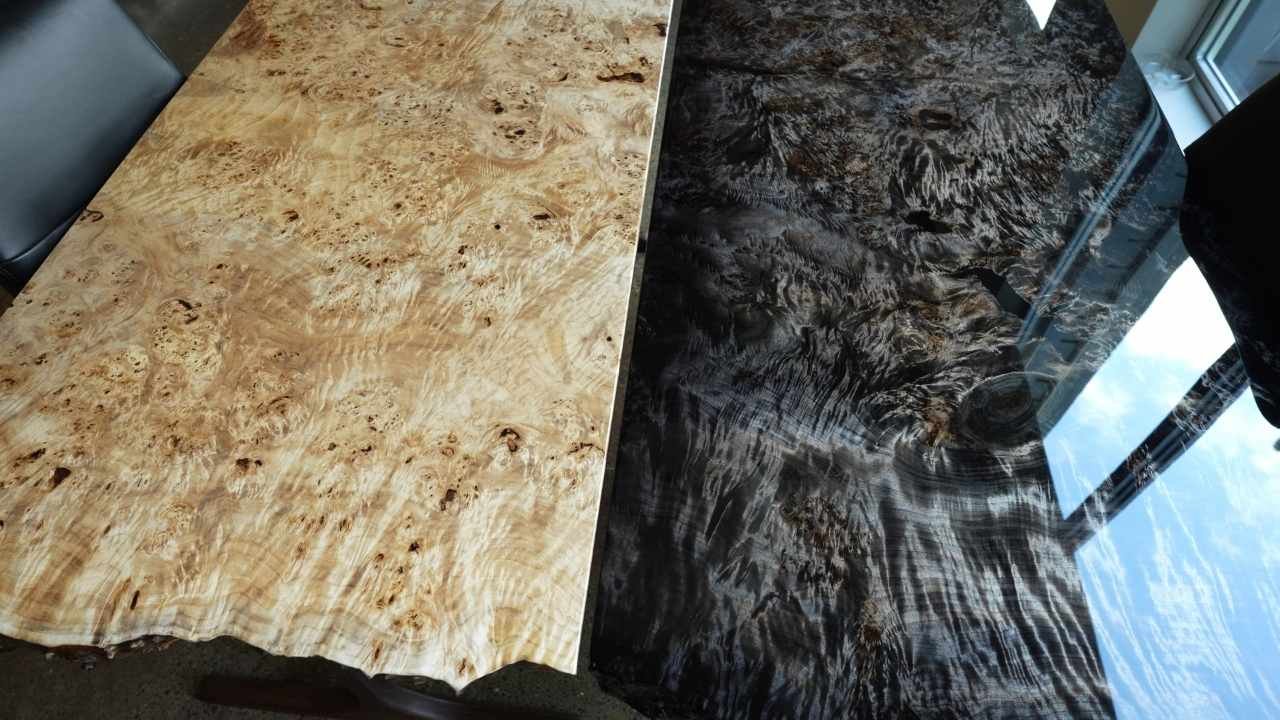
For my most recent piece, I wanted a dark black perimeter and a silver gray/black center. I achieved this by doing two fairly heavy coats of black across the entire top, then sanding fairly aggressively from the center out to about 4” from the edge. The wood I was using was a highly figured piece of Mappa Burl. So the dark black remained in the valleys of the curl/burl, but the peaks were sanded off. This enabled me to get a very 3D effect on the center section. After sanding away most of the color in the middle, I added another coat of more dilute black to the entire top. The transition from black to silver didn’t look quite natural in some areas, so I used plain water on a rag to help feather the colors together. The result was even better than I had expected. I am not sure if PRS would be proud of it, but I certainly was.
Finishing
I generally finish my tables with a hardwax oil like Rubio monocoat. However, to get a truly 3D PRS effect, you need a film-type finish. Guitars often use Nitro, I am told. Lacquer, varnish, poly, or epoxy will all give similar effects. Since I don’t own a spray gun and am decent with epoxy, I opted for tabletop epoxy. Epoxy will be the thickest of any finish and likely give you the most 3d effect. But there is no reason not to use something like a varnish or poly. It is also worth noting that the higher the gloss, the more you will notice the grain and color. My first attempt at a table similar to this was finished with a satin varnish that completely muted the figure and color.
I won’t make this blog a deep dive into how to finish a table with epoxy. But I’m happy to give you some helpful tips.
Tip one: Seal your wood first. Epoxy is notorious for bubbles. Not just from mixing either. Air trapped in the wood will try and escape, leaving a Milkyway-cloud of tiny bubbles after the finish cures. These are different than the mixing bubbles too. I seal my tables with one or two coats of epoxy thinned with acetone. I flood the surface, let it soak in as much as possible, then scrape off all excess epoxy with a Bondo spreader.
Tip two: Warm your epoxy. Epoxy is self-leveling… well, kind of. Epoxy is supposed to be self-leveling. I help assist with the leveling by warming my unmixed resins in a water bath of around 100F. This will lower the viscosity and help it self-level.

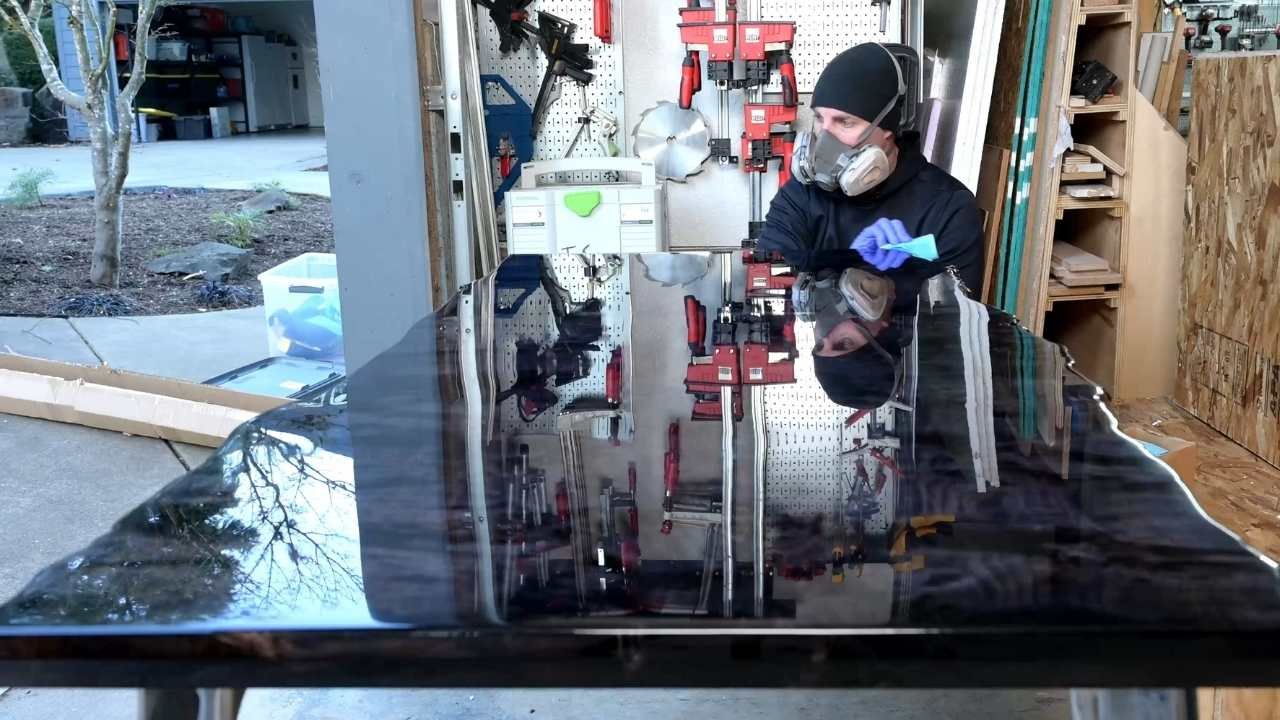
Pizza sauce method on this epoxy top coat
Tip three: Pizza sauce method. Don’t use roller, notched trowels, brushes, or anything like that. I just use a nitrile glove to spread my epoxy. Pour a pool of mixed epoxy in the center of your table and spread it out towards the edges like you are spreading tomato sauce on a pizza. This really works, and works well.
Tip four: Let gravity smooth your edges. Edges can be tricky, but if you just use your hand to spread epoxy to the very edge and let it flow over, it can yield near perfect results. It does however leave substantial drips on the underside of the table, though. You can either scrape these off when the epoxy is still wet or apply painter’s tape to the bottom in advance. Then as the epoxy begins to set up, remove the tape while it is still wet. If done correctly, you will simply pull off the drips, leaving a perfect edge.
Tip five: Propane torch for bubbles and level. For your flood coat of epoxy, you will have a lot of bubbles that are the result of mixing. Use a propane torch for popping these bubbles. Just move the torch over the top quickly and evenly. The heat generated by the torch will also help the epoxy self-level. Wait for a minute or so between torch passes. You don’t want to overheat the epoxy at this point, but the bubbles will continue to rise to the surface for 10 minutes or so.
Tip Six: Automotive buffing. No matter how clean your setup is, you will get some spec of dust or hair in your epoxy. I have taken to full-blown automotive buffing of these tables. It is extremely frustrating and time-consuming but is the closest you can get to a “perfect” finish. This generally involves me sanding the final coat down to 800 grit or so, then up to 3000, then a multi-stage automotive compound until it is as perfect as I can get it.
Results
Is this desk as cool as a PRS guitar? Probably not. However, it will be more functional than a guitar for the vast majority of us. I would love to know what other guitar/instrument inspiration should I try to incorporate into furniture. Should I try some wild colors, like blues, greens, or even pink? Or would that be a little too gawdy? Either way, let me know what you think of this one and how I could improve on the next one!